In a recent project, a customer required integrating visualizations from Oracle Analytics into an Oracle APEX application running within Oracle Cloud Infrastructure. This article shares my experience with this integration, highlighting useful resources and addressing some challenges I encountered along the way.
Integration is not my primary focus, so I started by reviewing Oracle's documentation. Unfortunately, there is no comprehensive "cookbook" available, which led me to explore various resources online. While many blog posts, articles, and videos exist, most are somewhat dated, though still relevant, as both products have evolved rapidly over the past few years.
Despite this, I found some excellent resources that helped me significantly. For instance, Mike Durran's blog is an invaluable source for topics like this. I highly recommend his article A Guide to Embedding Oracle Analytics into Oracle APEX for a thorough understanding.
Let's begin with Oracle Analytics first
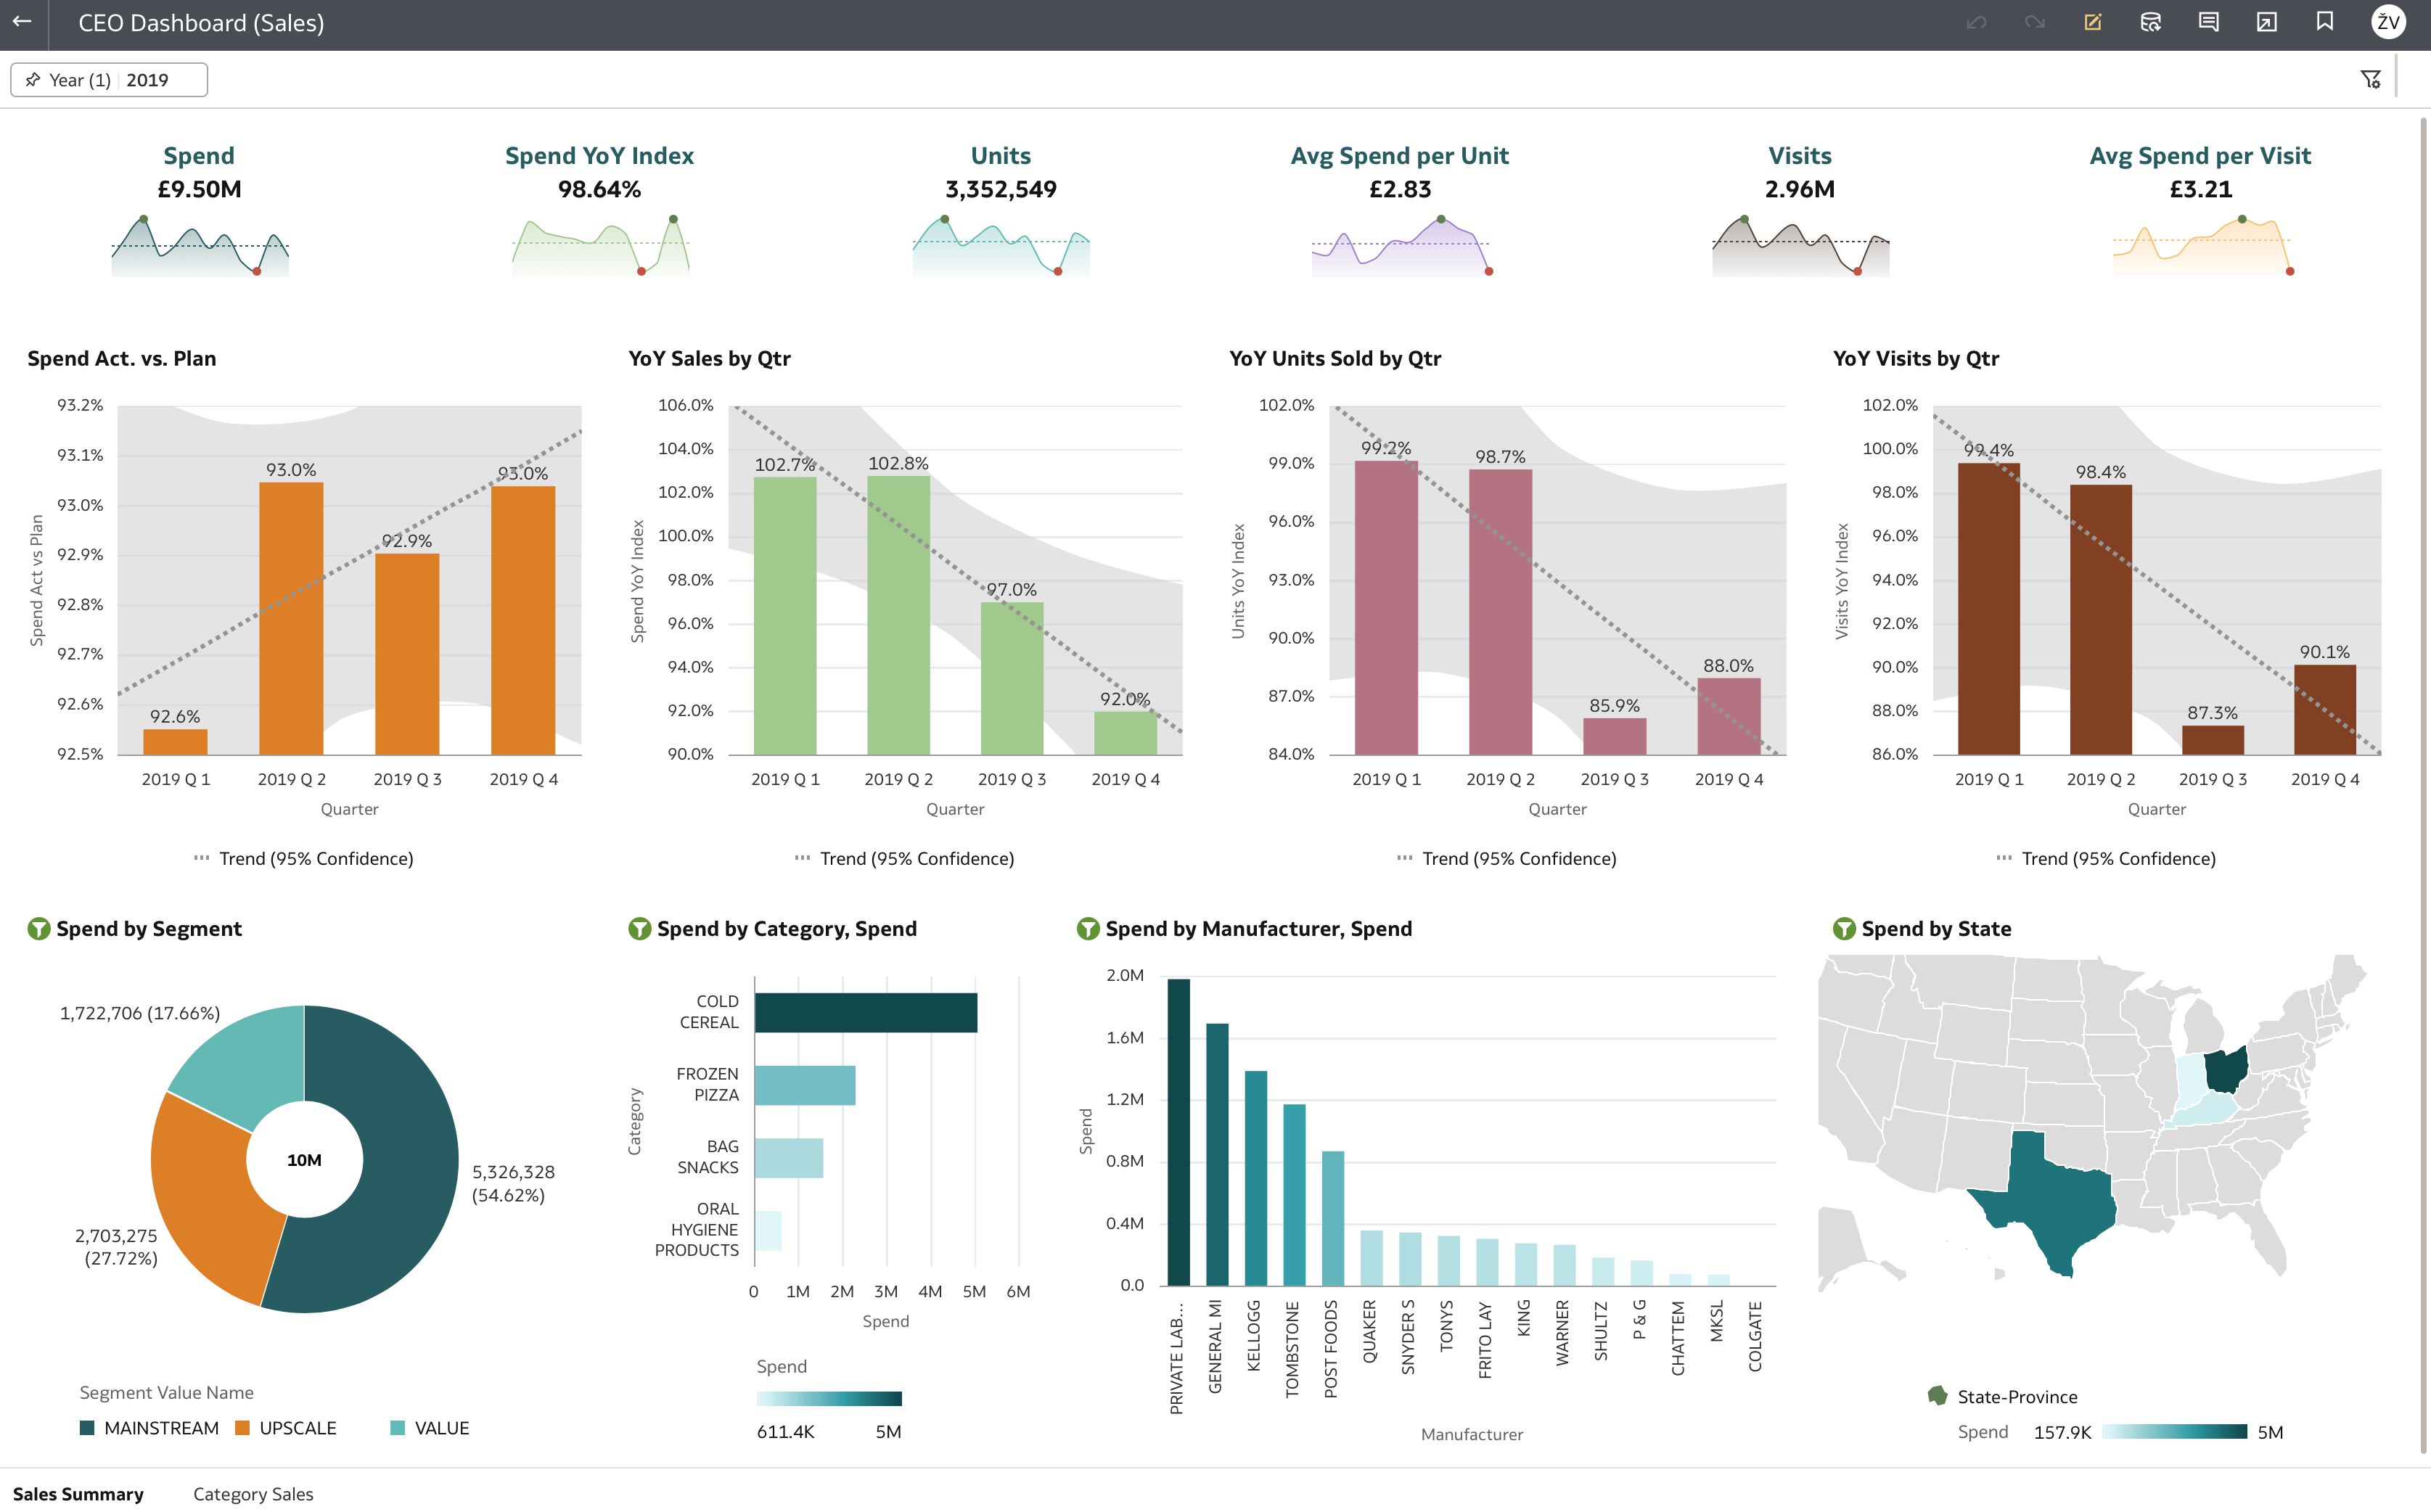
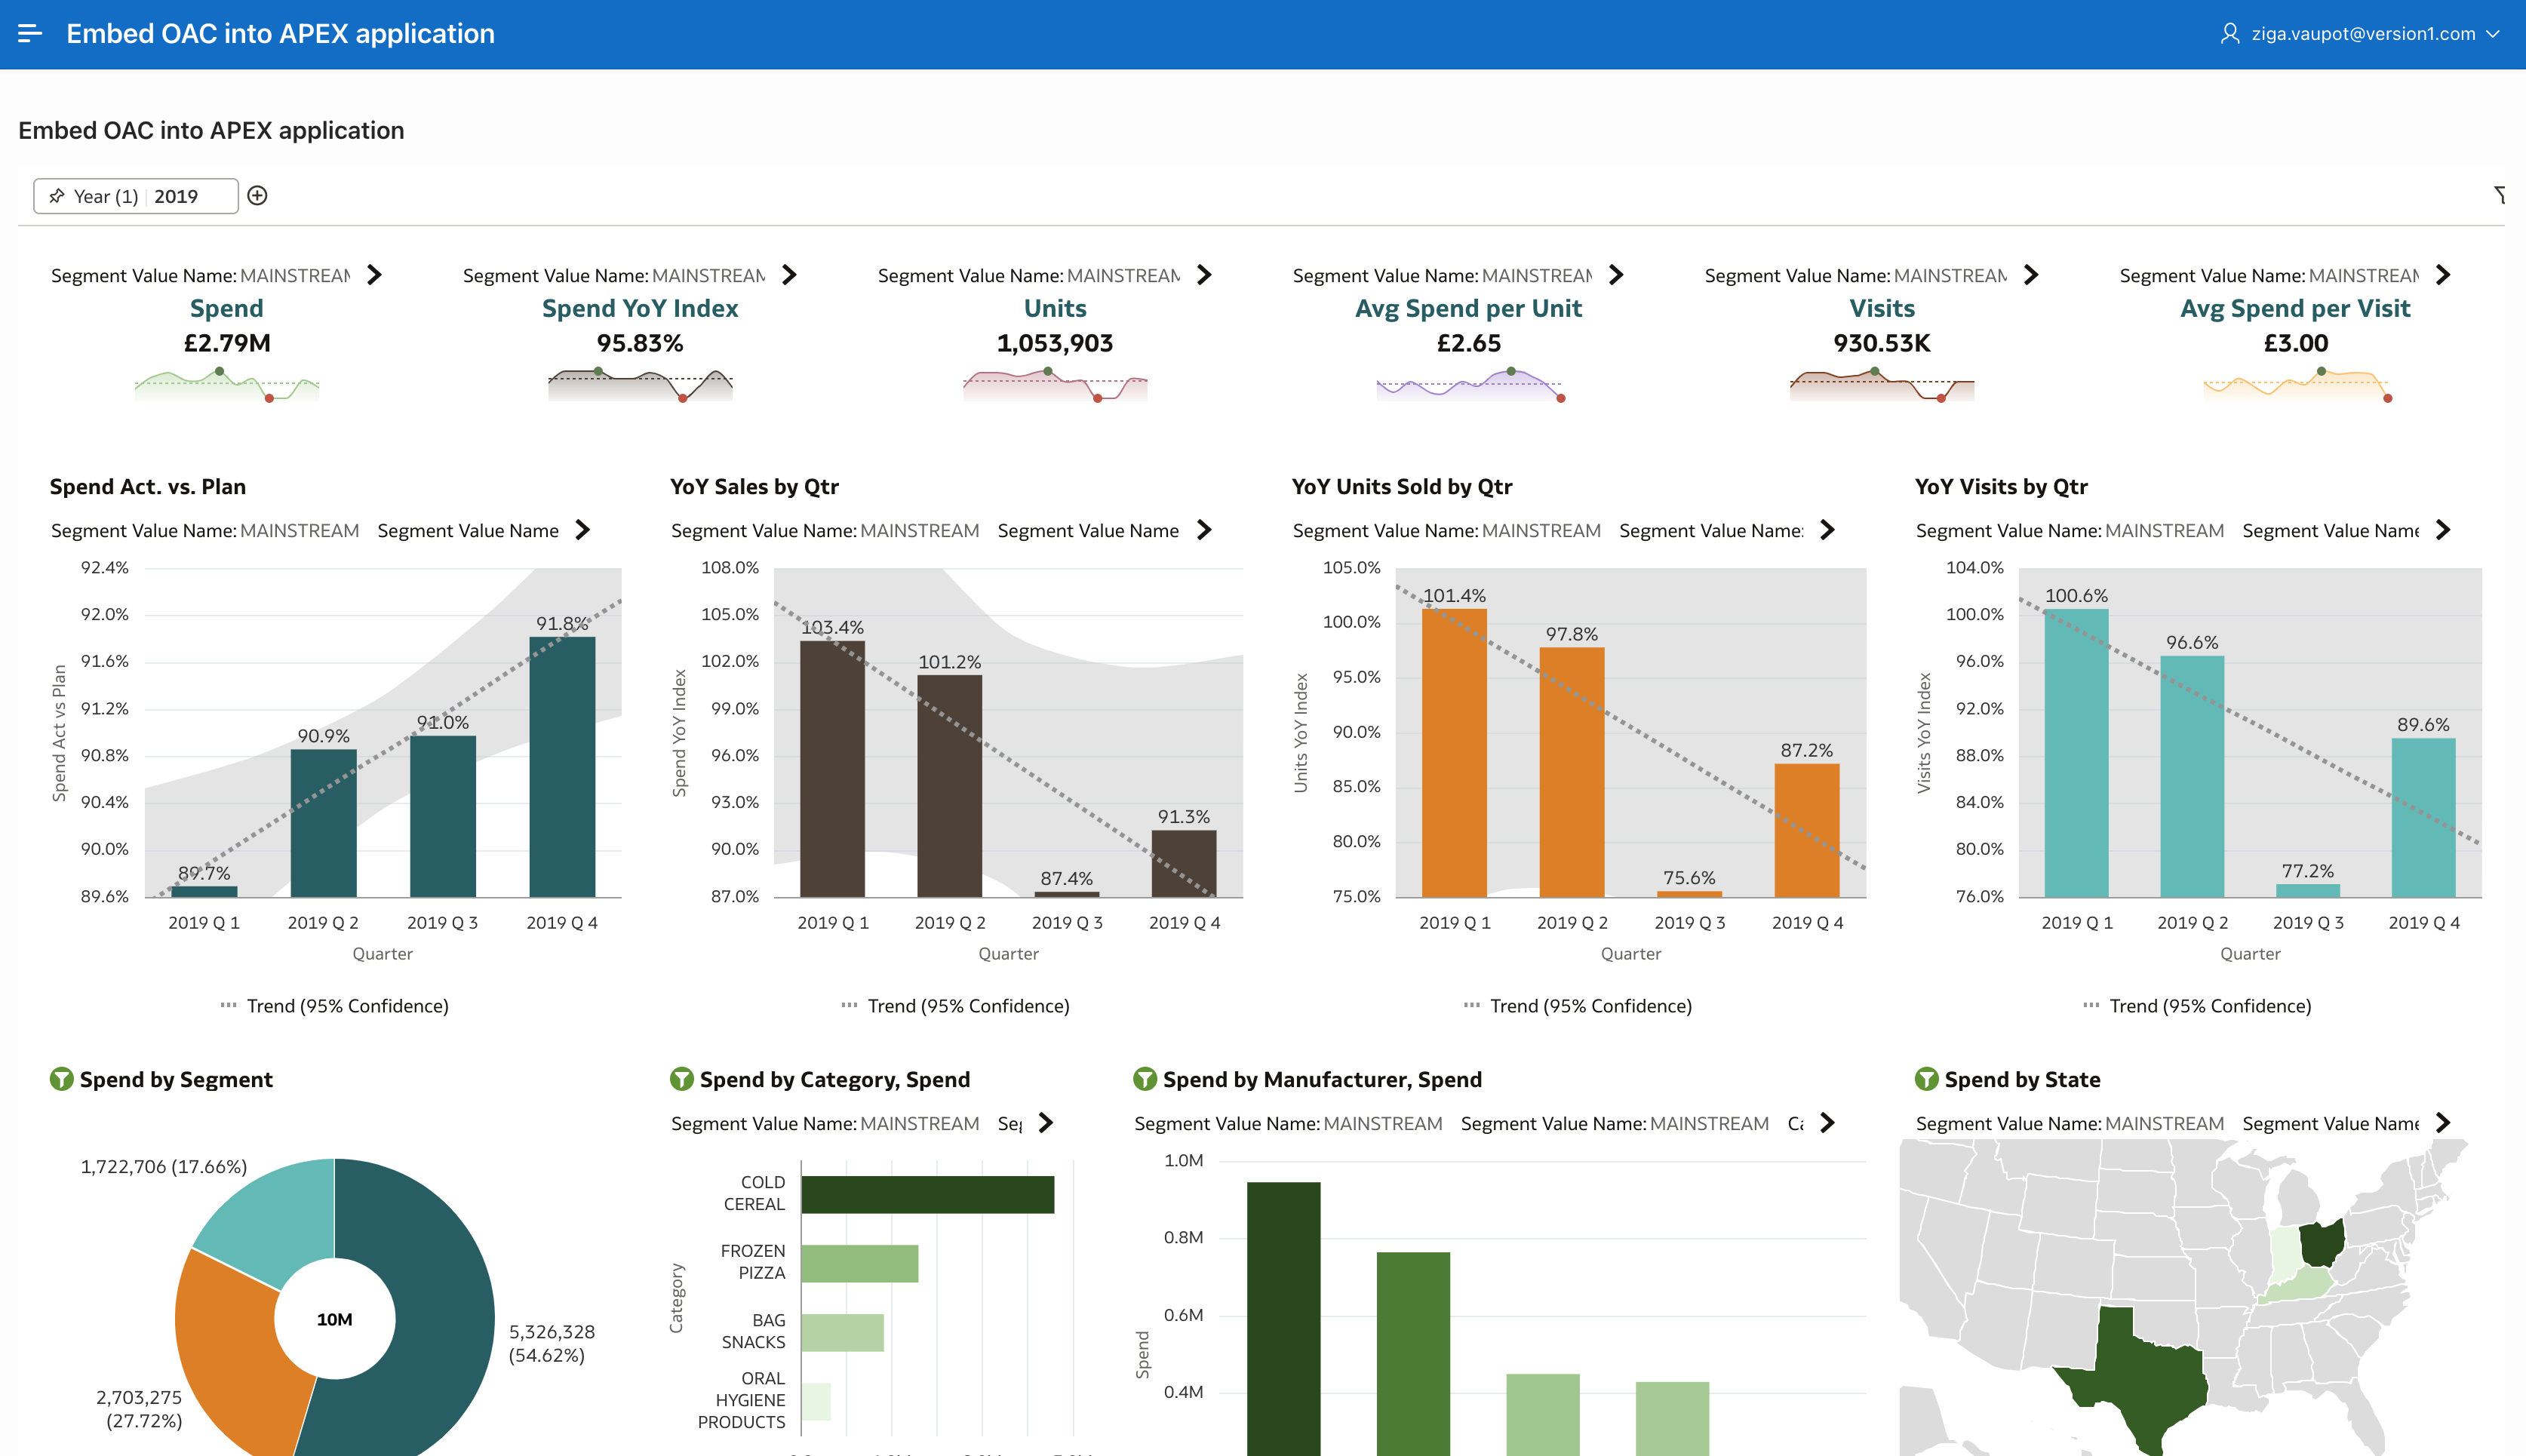
Our starting point is a data visualization that displays the company's sales.
One important aspect to note is the Developer options in Oracle Analytics. Under the Embed tab, developers can find options that facilitate embedding analytics content into other applications, such as Oracle APEX.
To embed a specific visualization into another application, a developer can simply copy the provided HTML code to display Oracle Analytics content.
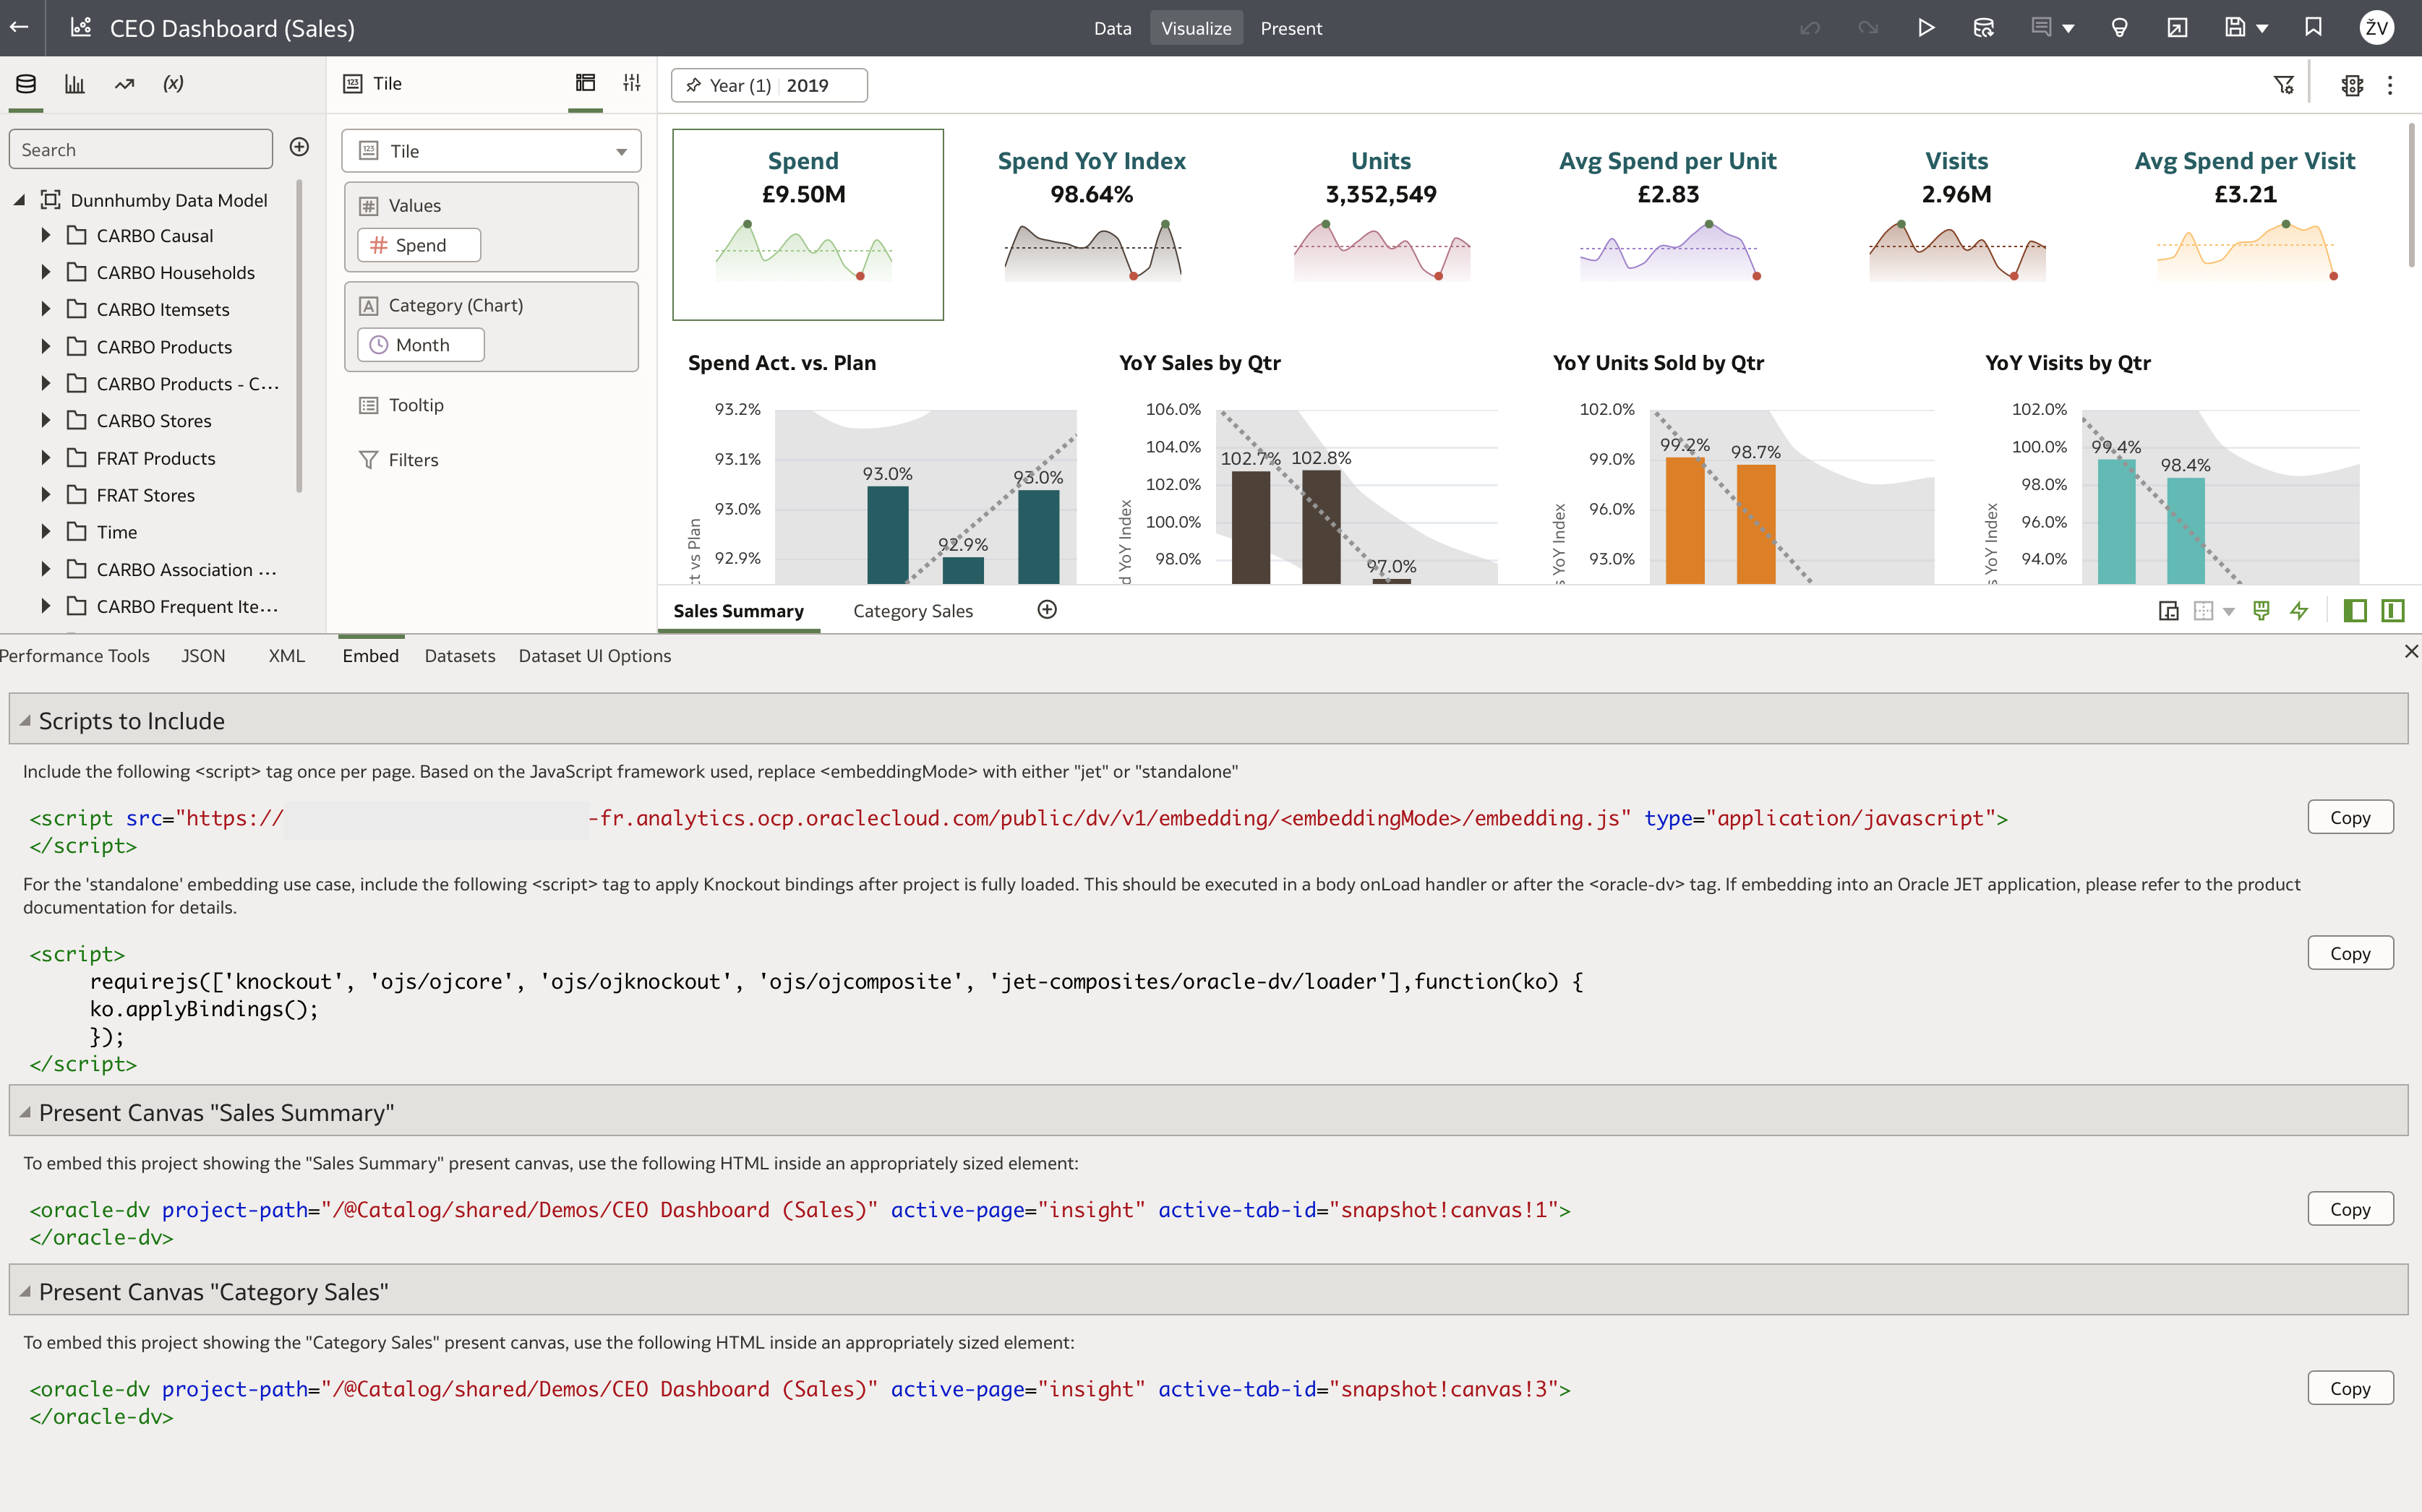
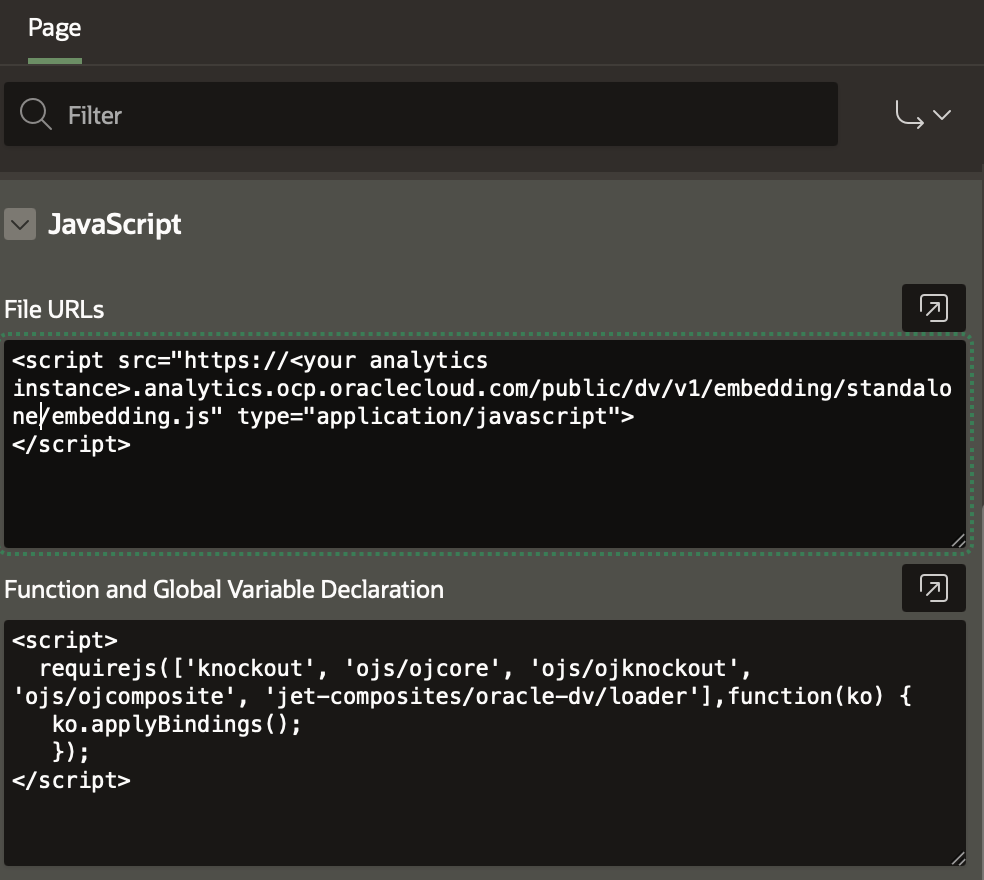
The following two JavaScript snippets must be included in the HTML page, typically at the page level:
<script src="https://<your analytics instance>.analytics.ocp.oraclecloud.com/public/dv/v1/embedding/<embeddingMode>/embedding.js" type="application/javascript">
</script>
Pay close attention to the embeddingMode part of the URL, which can take two possible values: jet and standalone.
- Use jet if the analytics content is embedded within an existing Oracle JET application.
- Use standalone when embedding visualization content in a generic application that does not use Oracle JET.
When using the standalone option, Knockout bindings must be applied after the visualization is fully loaded. This can be done by including the following script after the <oracle-dv> tag or by executing it in a body onload handler:
<script>
  requirejs(['knockout', 'ojs/ojcore', 'ojs/ojknockout', 'ojs/ojcomposite', 'jet-composites/oracle-dv/loader'], function(ko) {
    ko.applyBindings();
  });
</script>
Finally, the <oracle-dv> tag is used to display the visualization canvas in the target application, which in our case is Oracle APEX. For example, to display the first canvas, use:
<oracle-dv project-path="/@Catalog/shared/Demos/CEO Dashboard (Sales)" active-page="insight" active-tab-id="snapshot!canvas!1">
</oracle-dv>
To display a different canvas, such as canvas3, update the active-tab-id accordingly:
<oracle-dv project-path="/@Catalog/shared/Demos/CEO Dashboard (Sales)" active-page="insight" active-tab-id="snapshot!canvas!3">
</oracle-dv>
REMARKS:
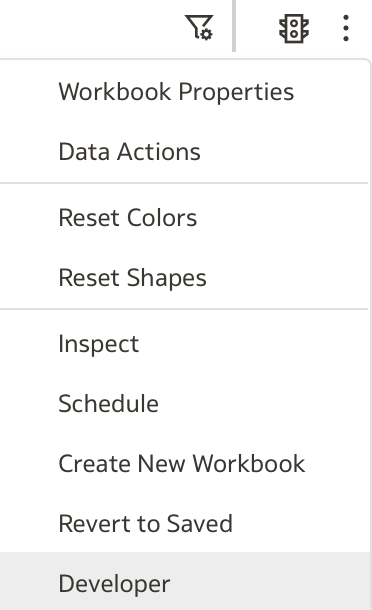
- To open Developer Options, click on the Workbook Menu. The Developer option is the last item in the menu:
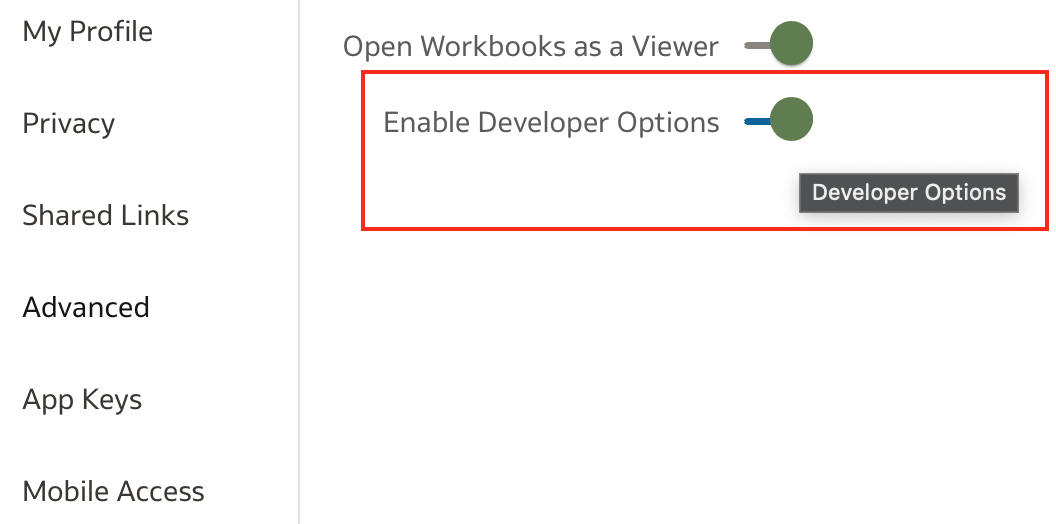
- If the Developer option does not appear in the menu, Developer Options are not enabled. To enable them, click on the user icon (top right corner) and select Profile.
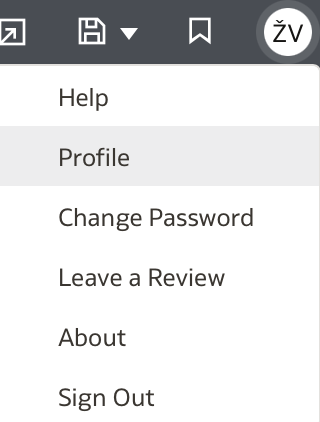
Then, navigate to the Advanced tab and enable Developer options:
APEX Application
In this example, I created a straightforward APEX application to demonstrate how Oracle Analytics Cloud (OAC) can be embedded into an APEX environment. The application itself is simple, serving primarily as a container for the embedded analytics content.
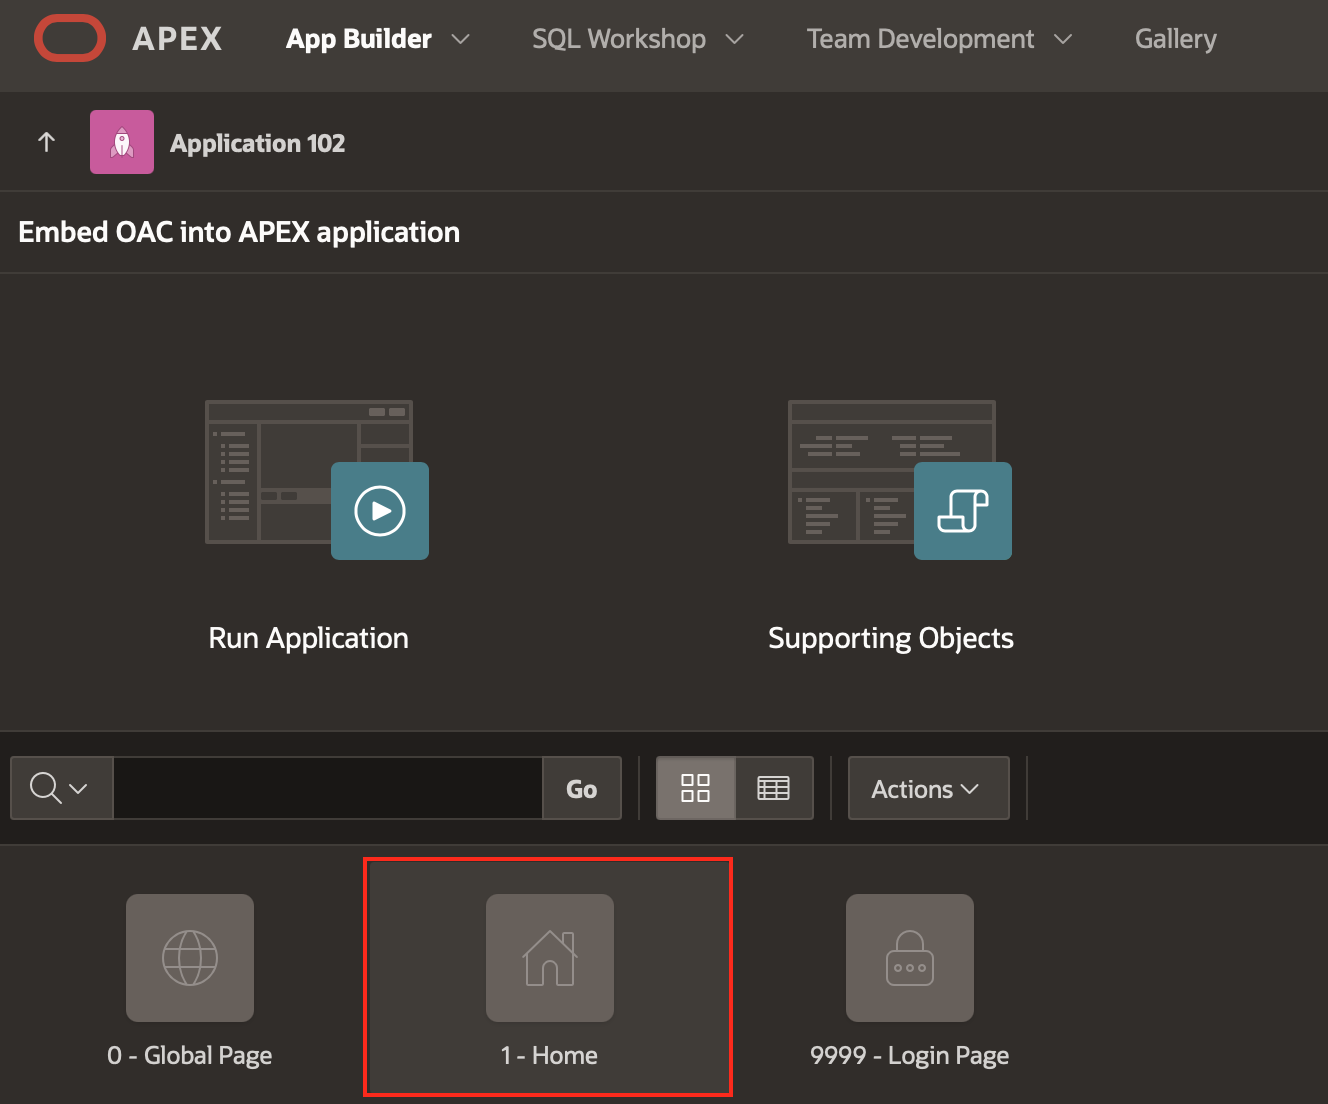
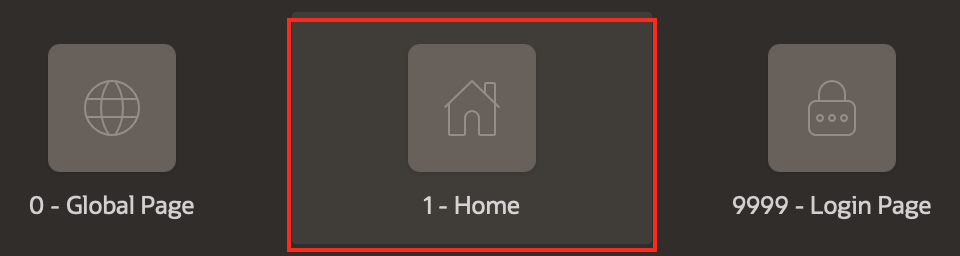
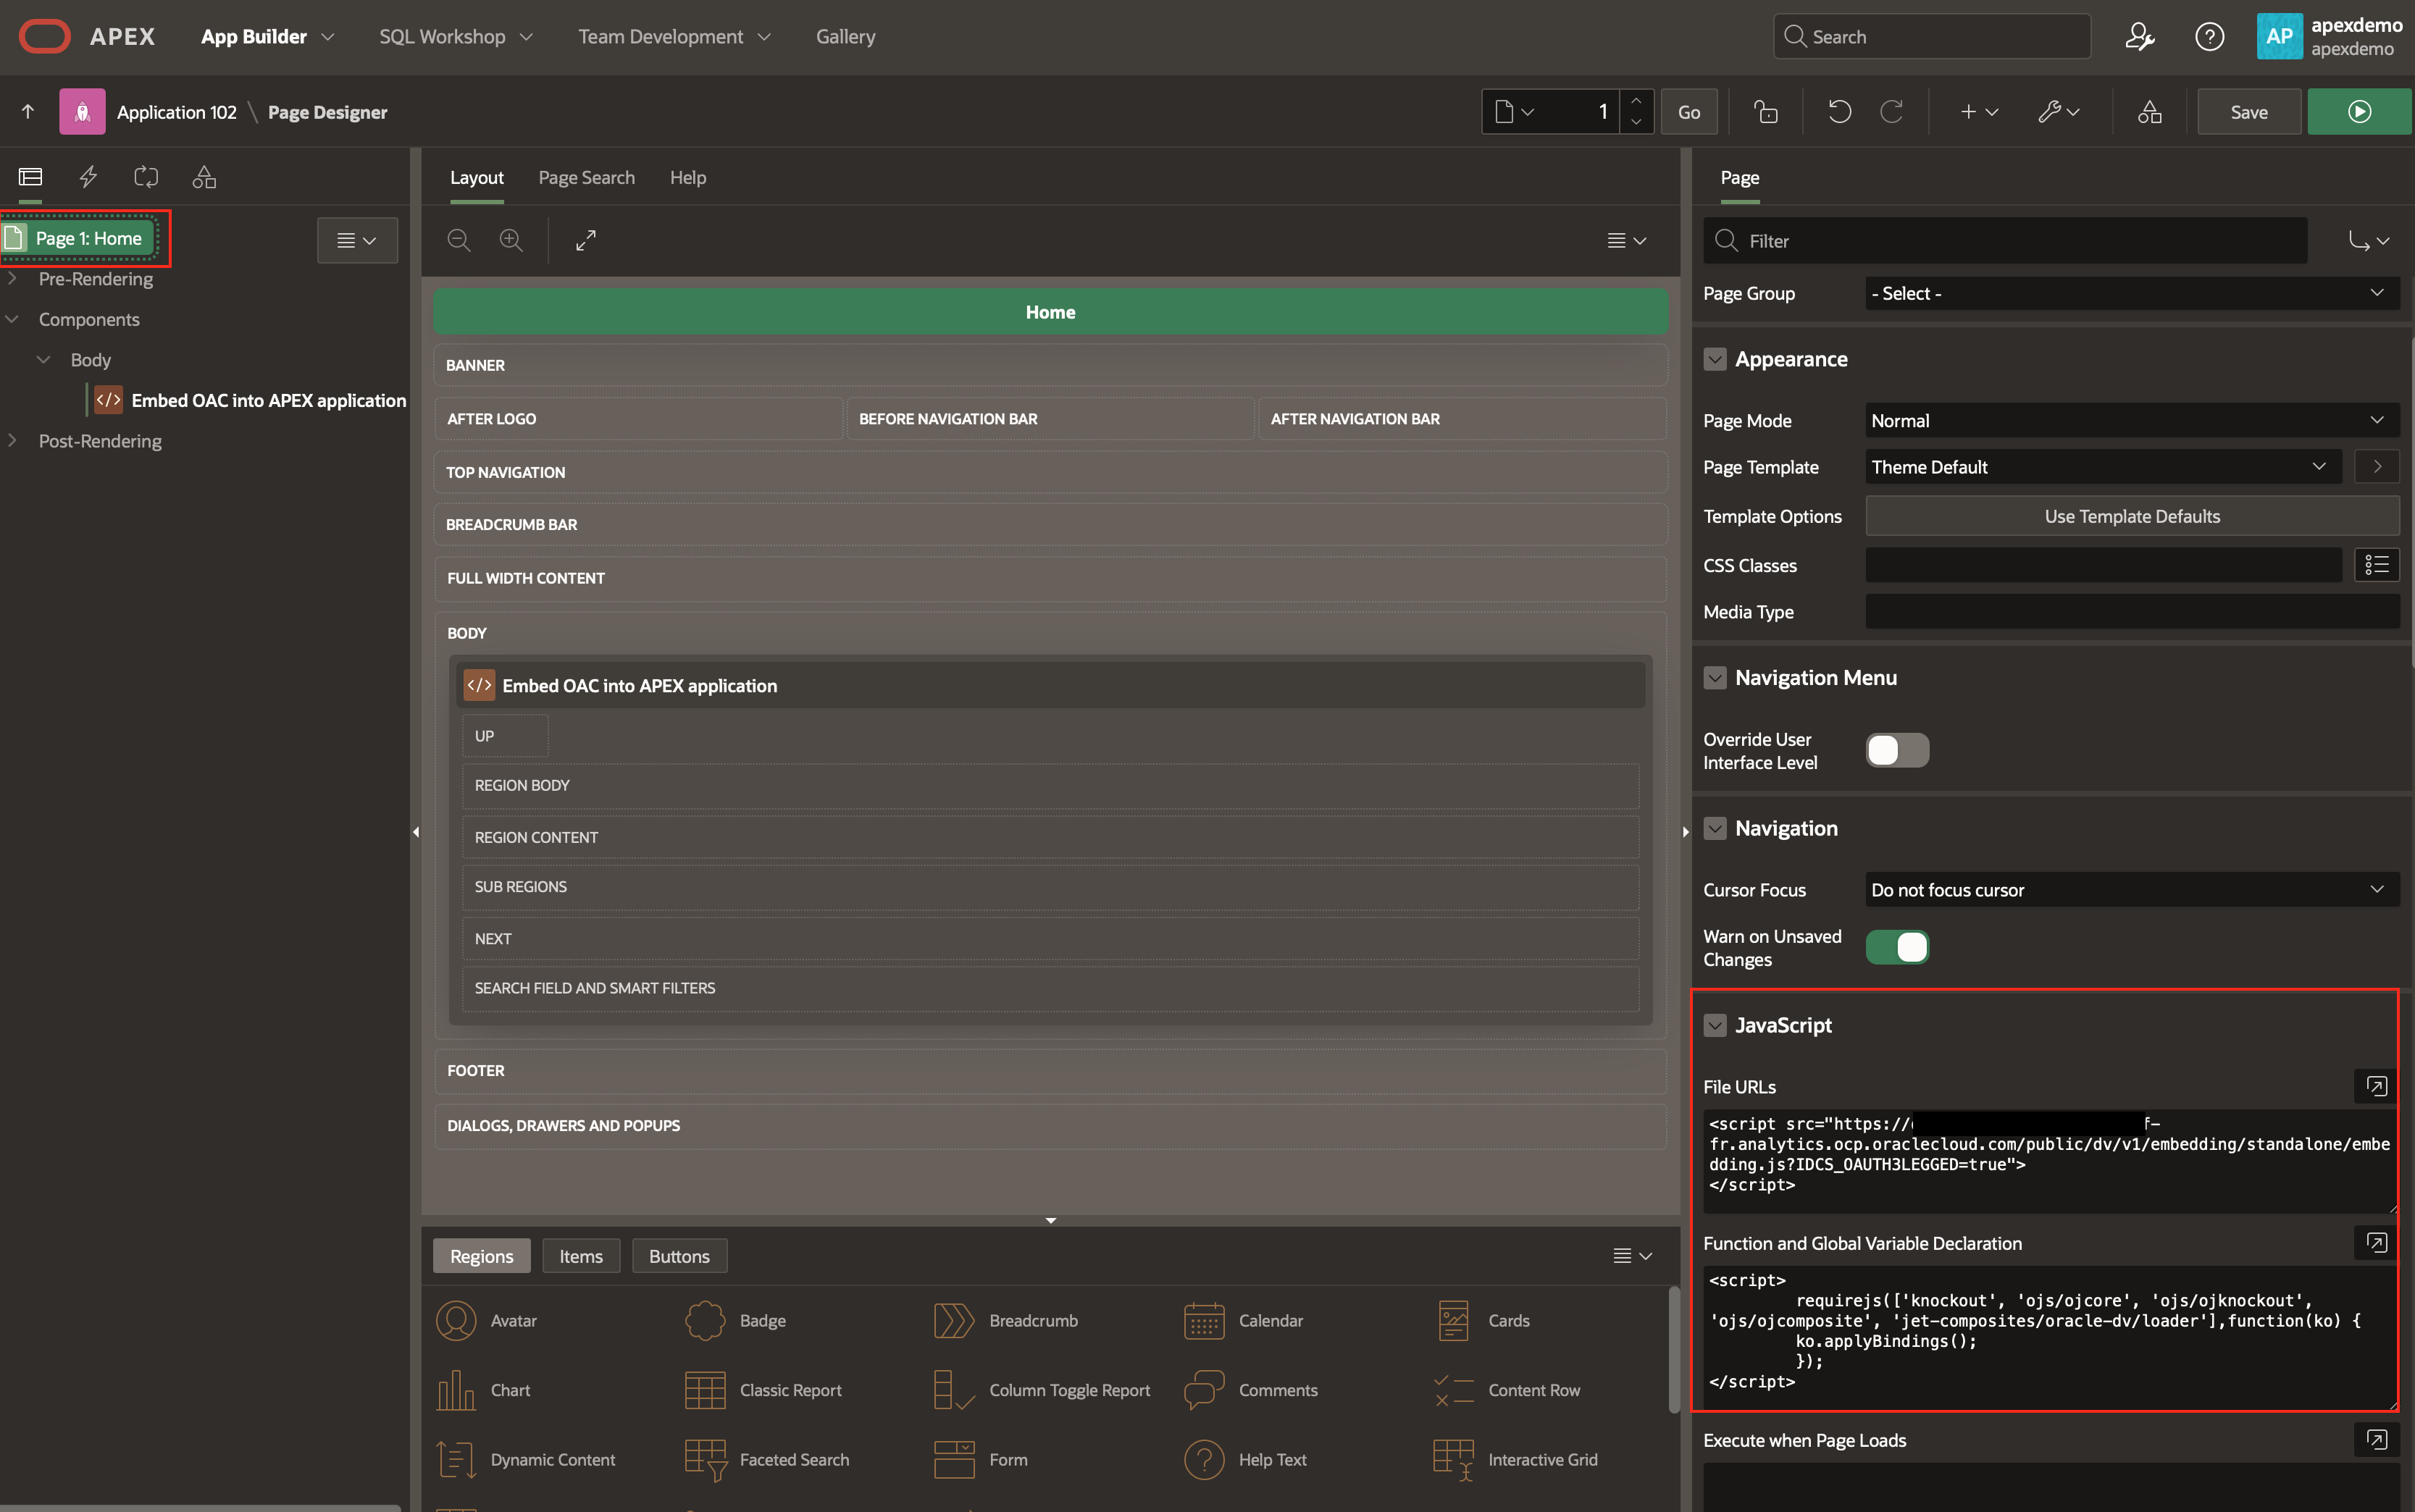
From the available pages, select 1 - Home.
Within this page, a new region called <body> has been created. This region is where the main embedding takes place. While the application requires minimal coding overall, the integration involves specific configurations at two levels:
- The
<page>level, where global JavaScript and variables are defined, and - The
<body>region, where the actual embedding of the OAC content occurs.
Let’s first look at the <page> level. In the two fields labeled File URLs and Function and Global Variable Declaration, you should paste the code snippets provided under the Developer / Embed tab of the Data Visualization workbook (refer to the explanation above for details):
After completing the page-level setup, navigate to the <body> region.
In the Identification section, set the Type to Static Content.
In the Source section, enter the following HTML snippet into the HTML Code field:
<iframe src="https://<Oracle Analytics Cloud URL>.analytics.ocp.oraclecloud.com/ui/dv/ui/project.jsp?pageid=visualAnalyzer&viewermode=true&noheader=true&reportmode=full&reportpath=%2F%40Catalog%2Fshared%2FDemos%2FCEO%20Dashboard%20(Sales)" width="1200px" height="900px" frameborder="0"></iframe>
I initially attempted to use the code snippet provided under the Developer tab that utilizes the <oracle-dv> custom element, but I was unable to get it to work. Any suggestions on what I might have missed or done incorrectly are more than welcome!
Here is the snippet that should have worked but did not:
<div style='width: 1200px; height: 900px'>
<oracle-dv project-path="/@Catalog/shared/Demos/CEO Dashboard (Sales)" active-page="insight" active-tab-id="snapshot!canvas!1">
</oracle-dv>
</div>
Since the <iframe>-based solution worked reliably, I decided to postpone troubleshooting the <oracle-dv> approach for now.
At this point, you might expect that embedding Oracle Analytics Cloud Data Visualization directly within an APEX application would be straightforward. Indeed, several blog posts claim this integration works seamlessly. However, if you try to run your application now, it will not function as expected. This is because APEX uses its own authentication mechanism, while Oracle Analytics Cloud relies on Oracle Identity Cloud Service (IDCS). These two authentication systems are not integrated by default, which prevents the embedded content from loading properly.
In summary, while it is possible to embed OAC content within an APEX application using an <iframe>, resolving the authentication challenge between APEX and Oracle Analytics Cloud is essential for a fully functional integration. Addressing this will be the next critical step in enabling seamless embedding and user experience.
Update OracleIdentityCloud domain
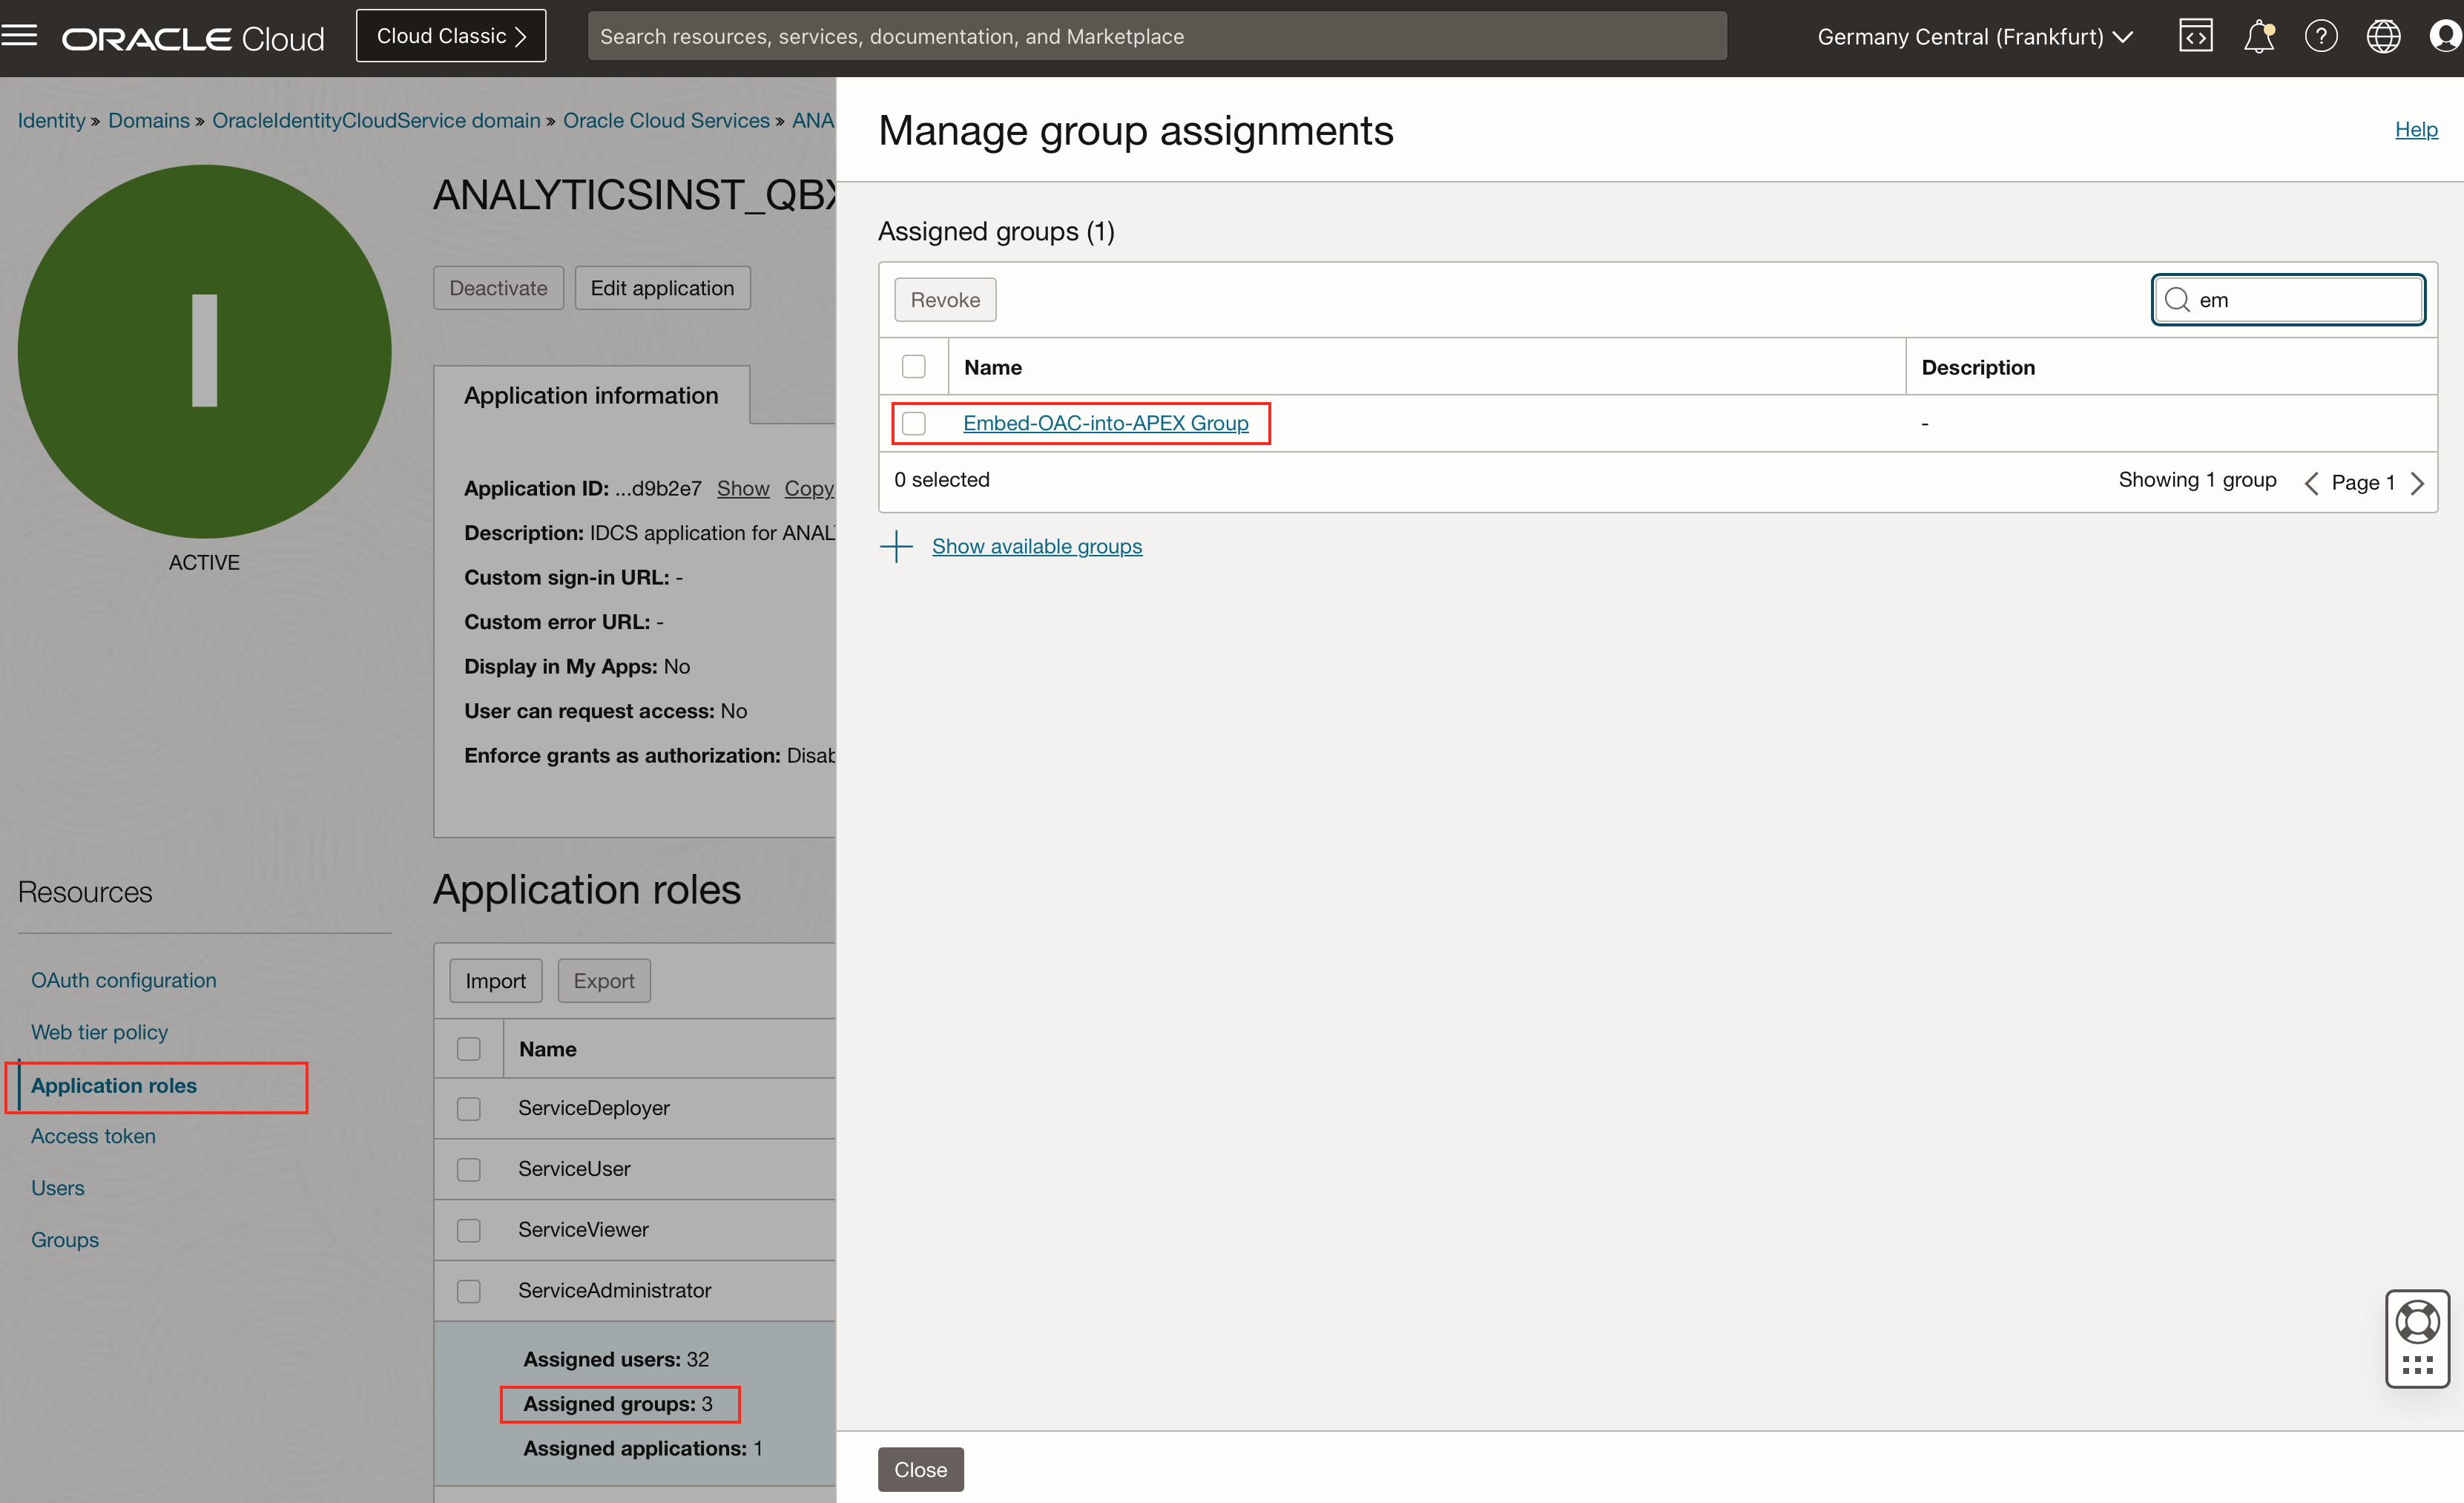
In this section, we'll walk through creating a new user group for users who need access to data visualization workbooks in Oracle Analytics. This step is optional if the user group already exists.

Next, assign the newly created group access to the analytics instance. In this example, we assign the ServiceAdministrator application role to the new group, though this role can be adjusted as needed.
Finally, let's create a new application under Integrated Applications. This involves two key parts:
- Configuring the APEX application, and
- Setting up OAuth.
When creating a new application, select Confidential Application.
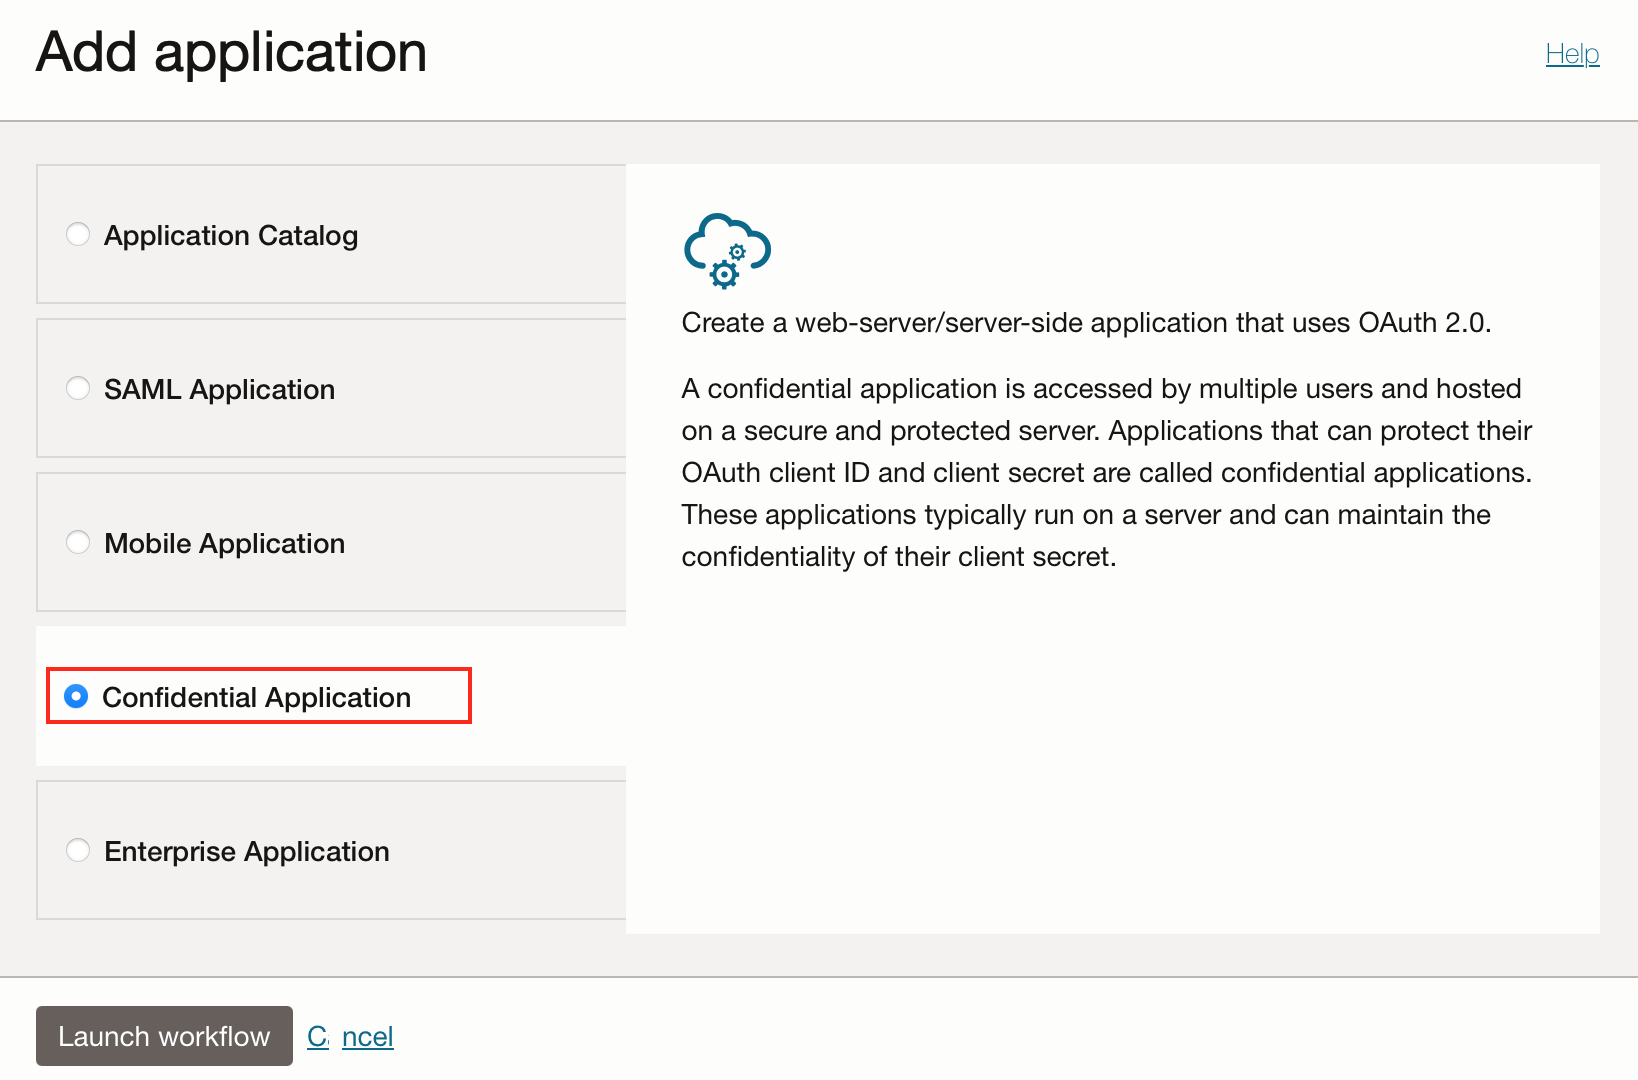
Follow the wizard to guide you through the process of setting up the new application.
Important entries to note:
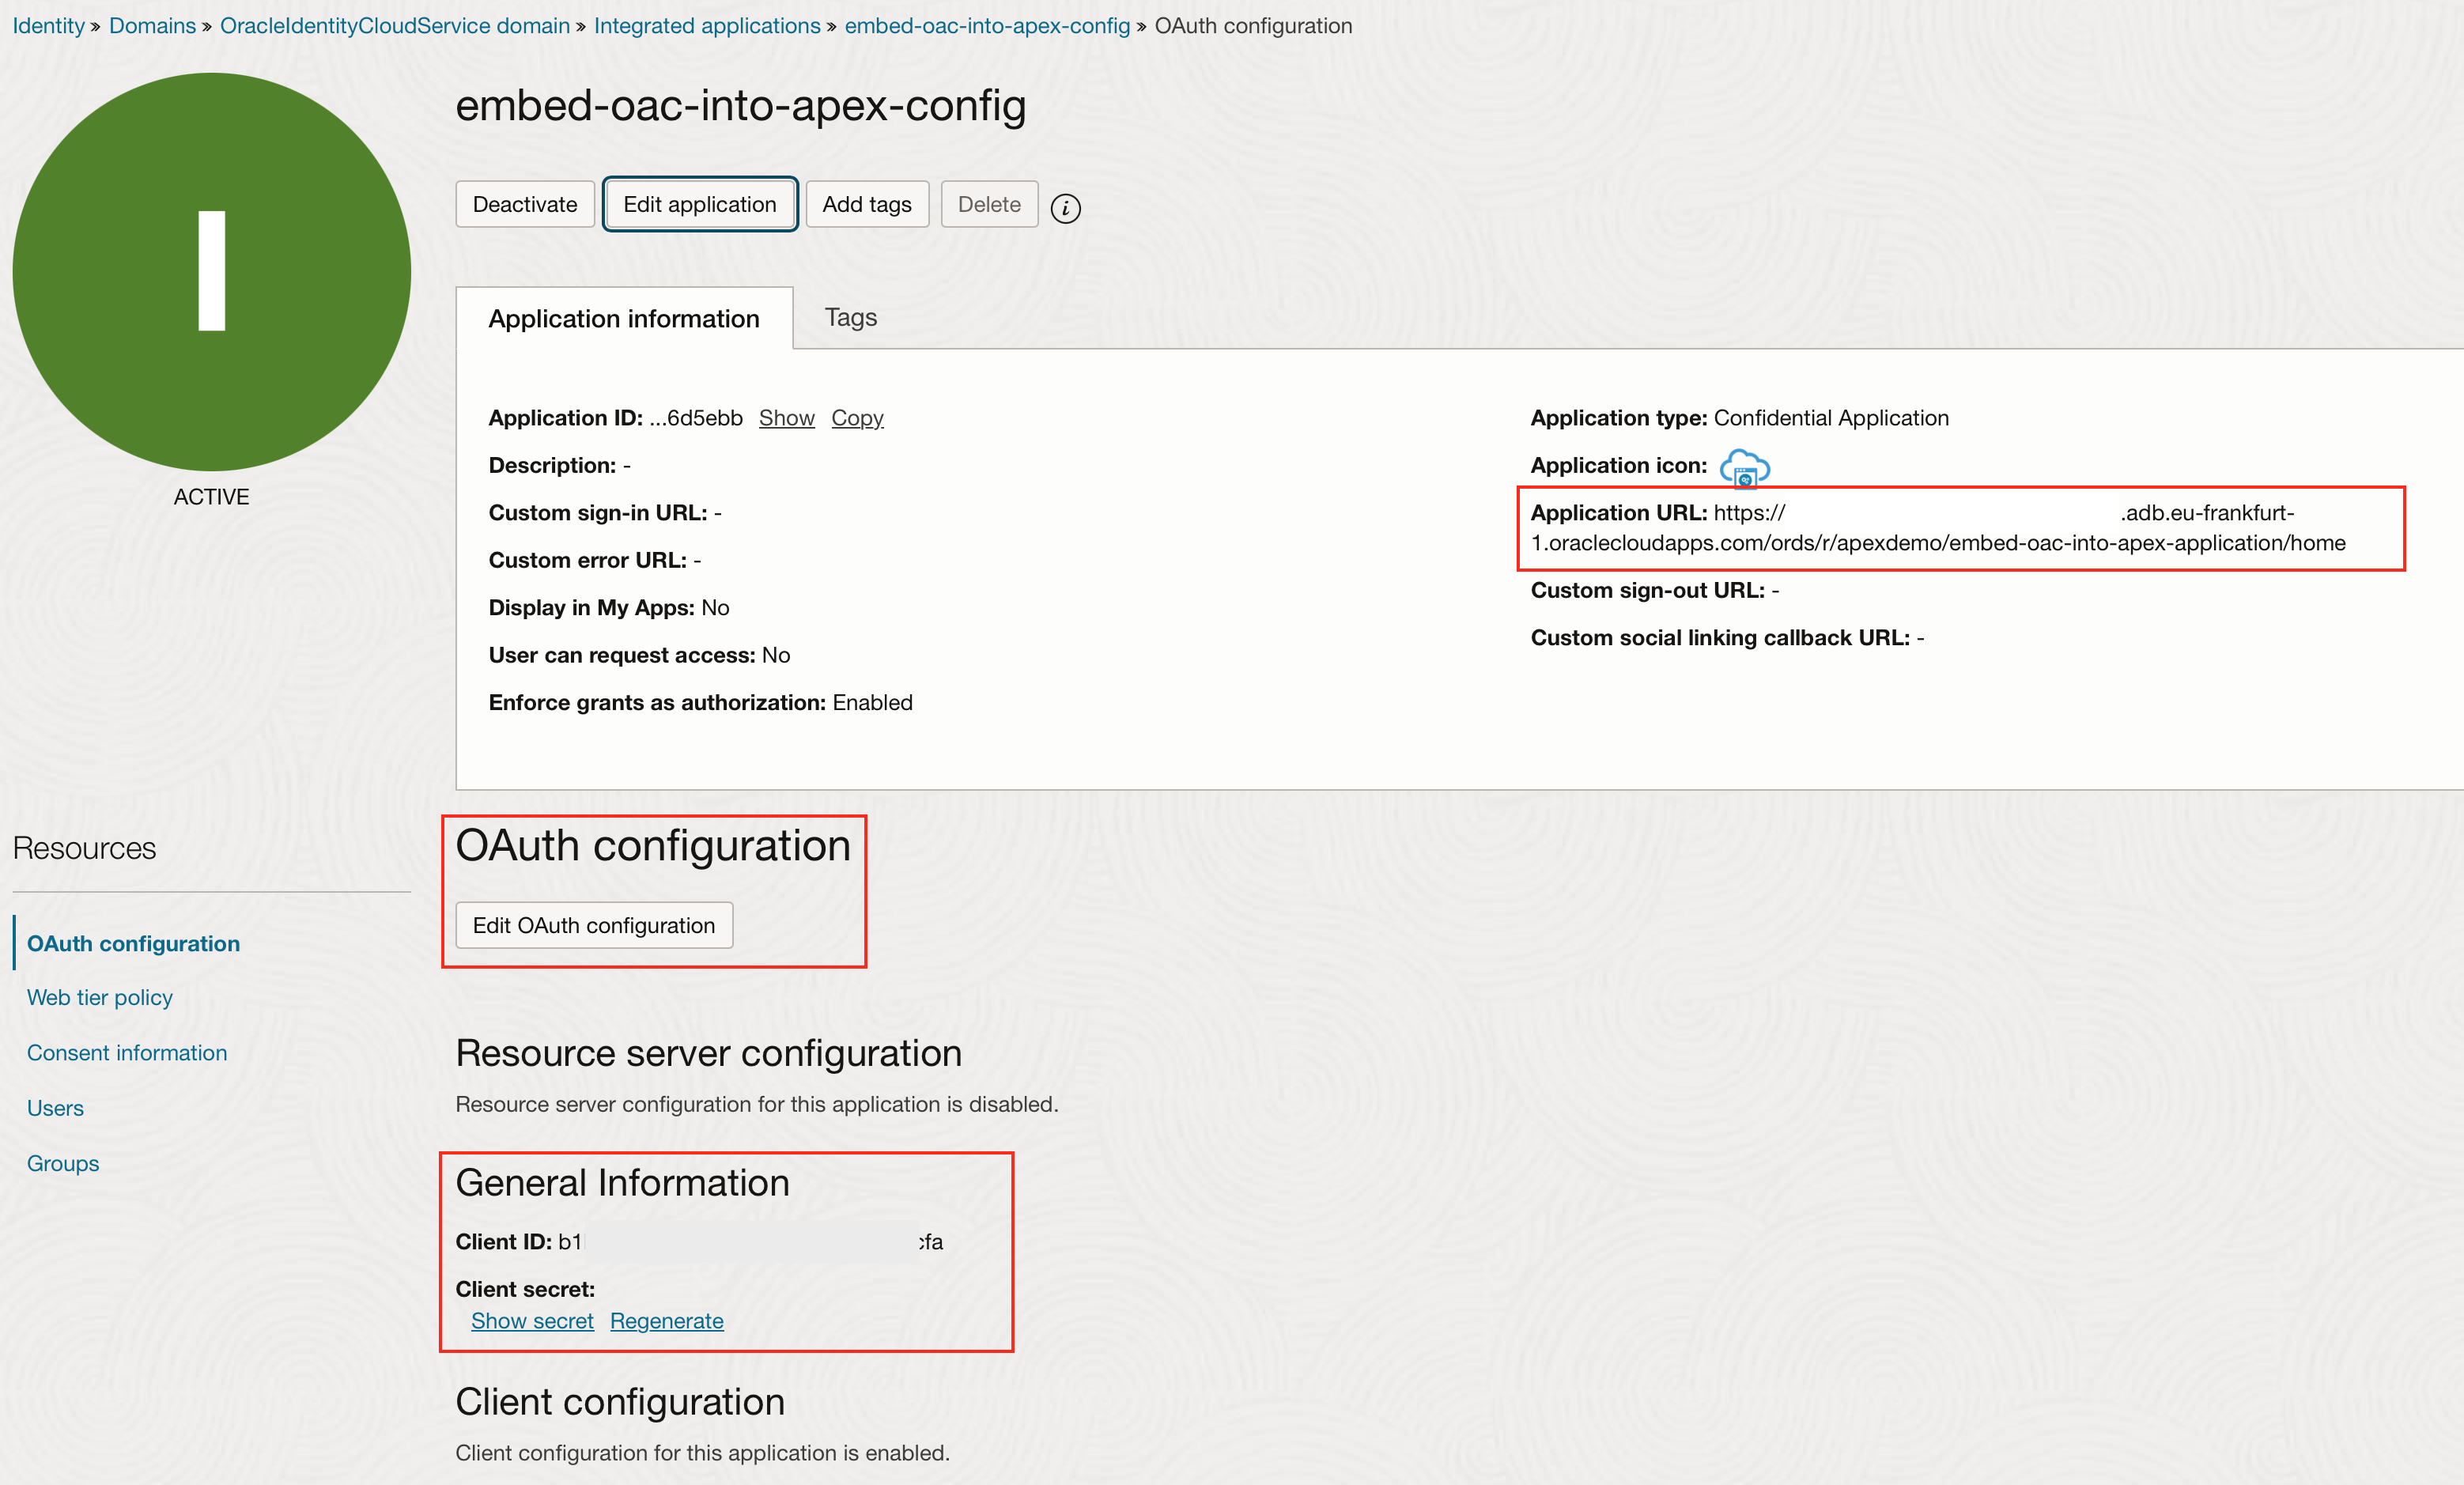
- In the URLs section, enter the APEX application URL as the Application URL.

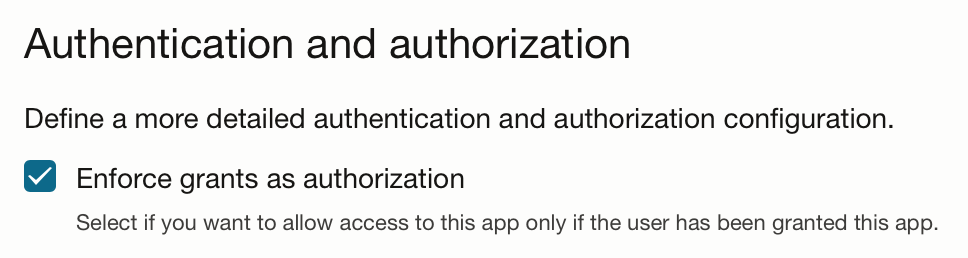
- In the Authentication and Authorization section, check Enforce grants as authorization.
When setting up OAuth, use the following configurations:
-
For Resource Server Configuration, select No resource server configuration.
-
For Client Configuration, select Configure this application as a client now.
-
Check the Authorization code checkbox.
-
Set the Redirect URL to:
https://<APEX instance URL>.adb.eu-frankfurt-1.oraclecloudapps.com/ords/apex_authentication.callback -
Set the Post-logout redirect URL to:
https://<APEX instance URL>.adb.eu-frankfurt-1.oraclecloudapps.com/ords/r/apexdemo/embed-oac-into-apex-application/home
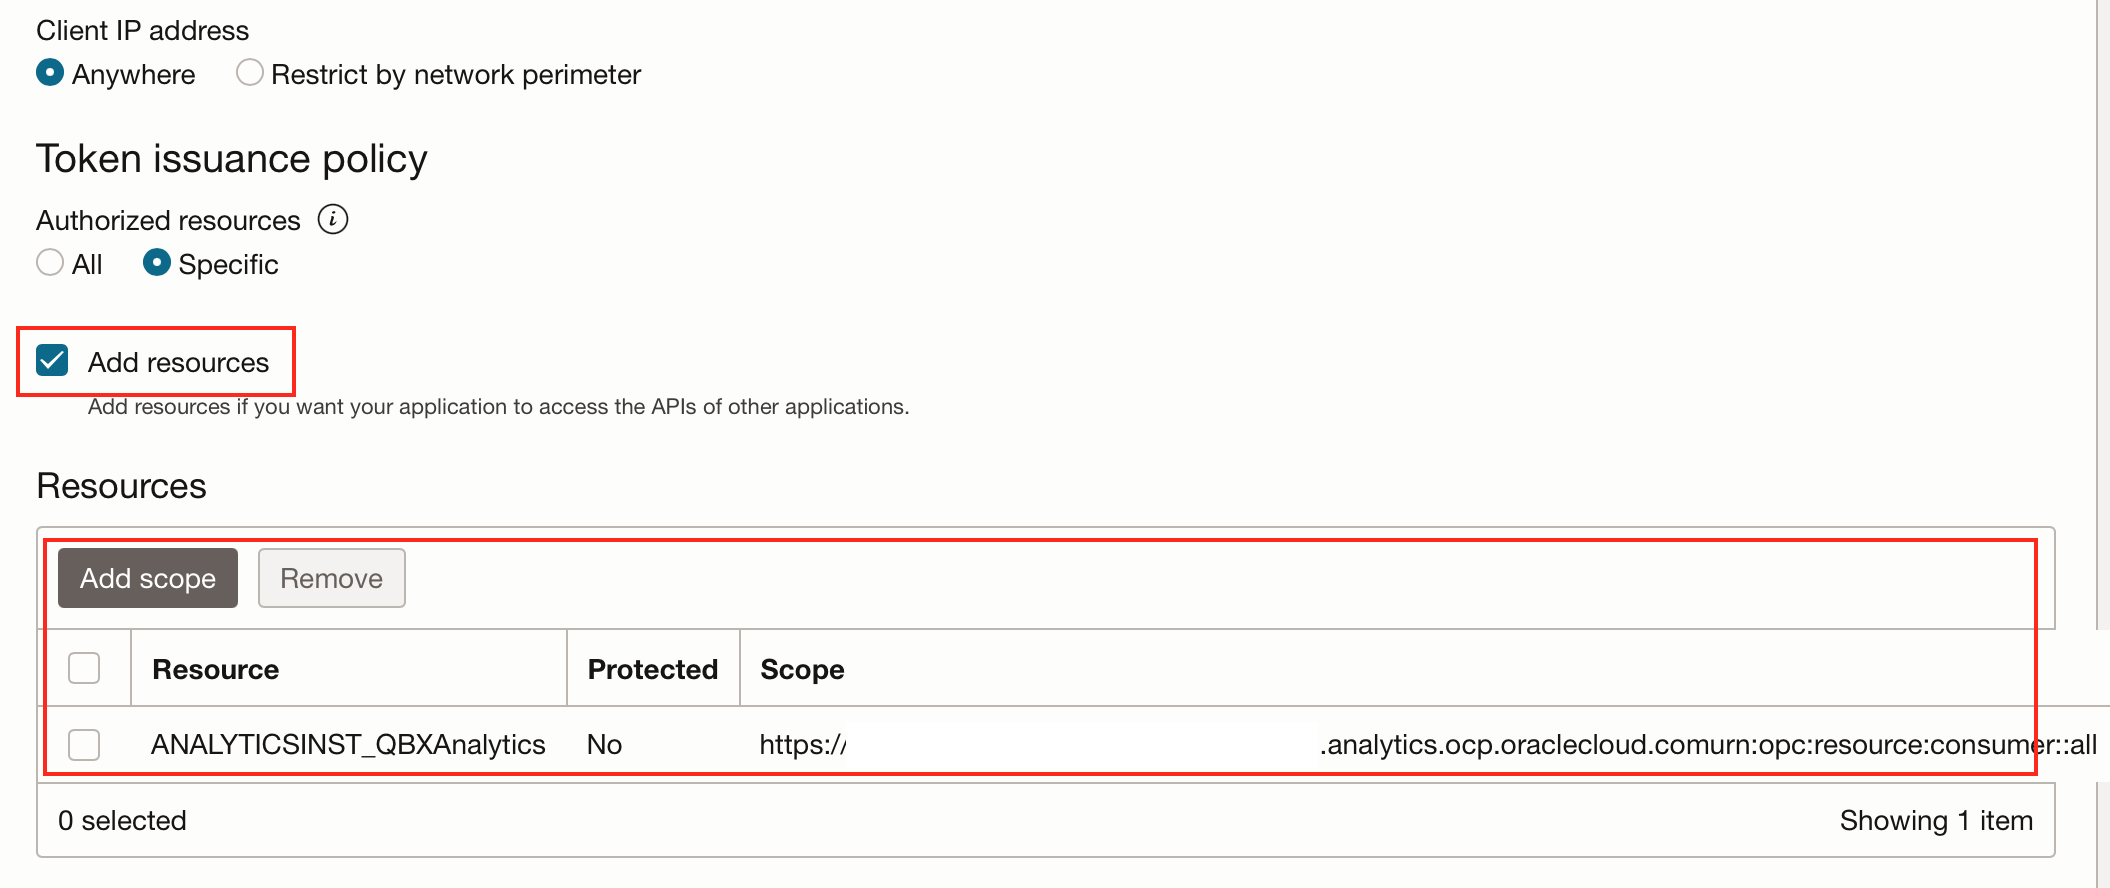
-
Check Add resources and add your analytics service to the resource list. This is necessary to enable API access for the Oracle Analytics application.
-
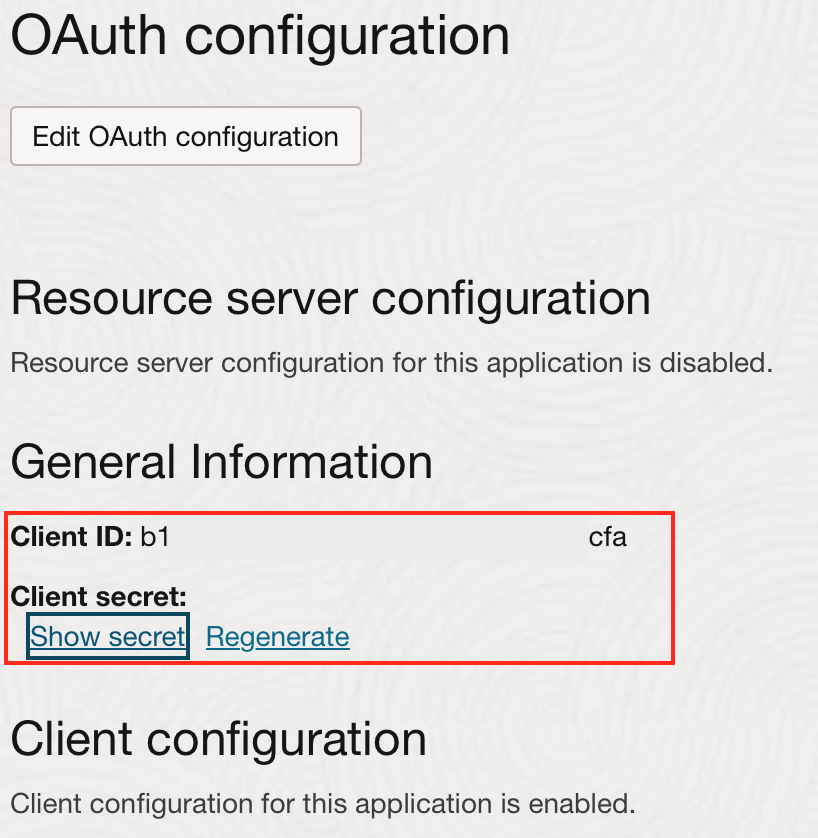
One more important detail: each application provides two key variables—Client ID and Client Secret. These will be required in the next step when creating Web Credentials.
You can find Client ID and Client Secret in the OAuth Configuration section under General Information.
Web Credentials
To enable your APEX application to access other applications, create Web Credentials using the Client ID and Client Secret obtained earlier.
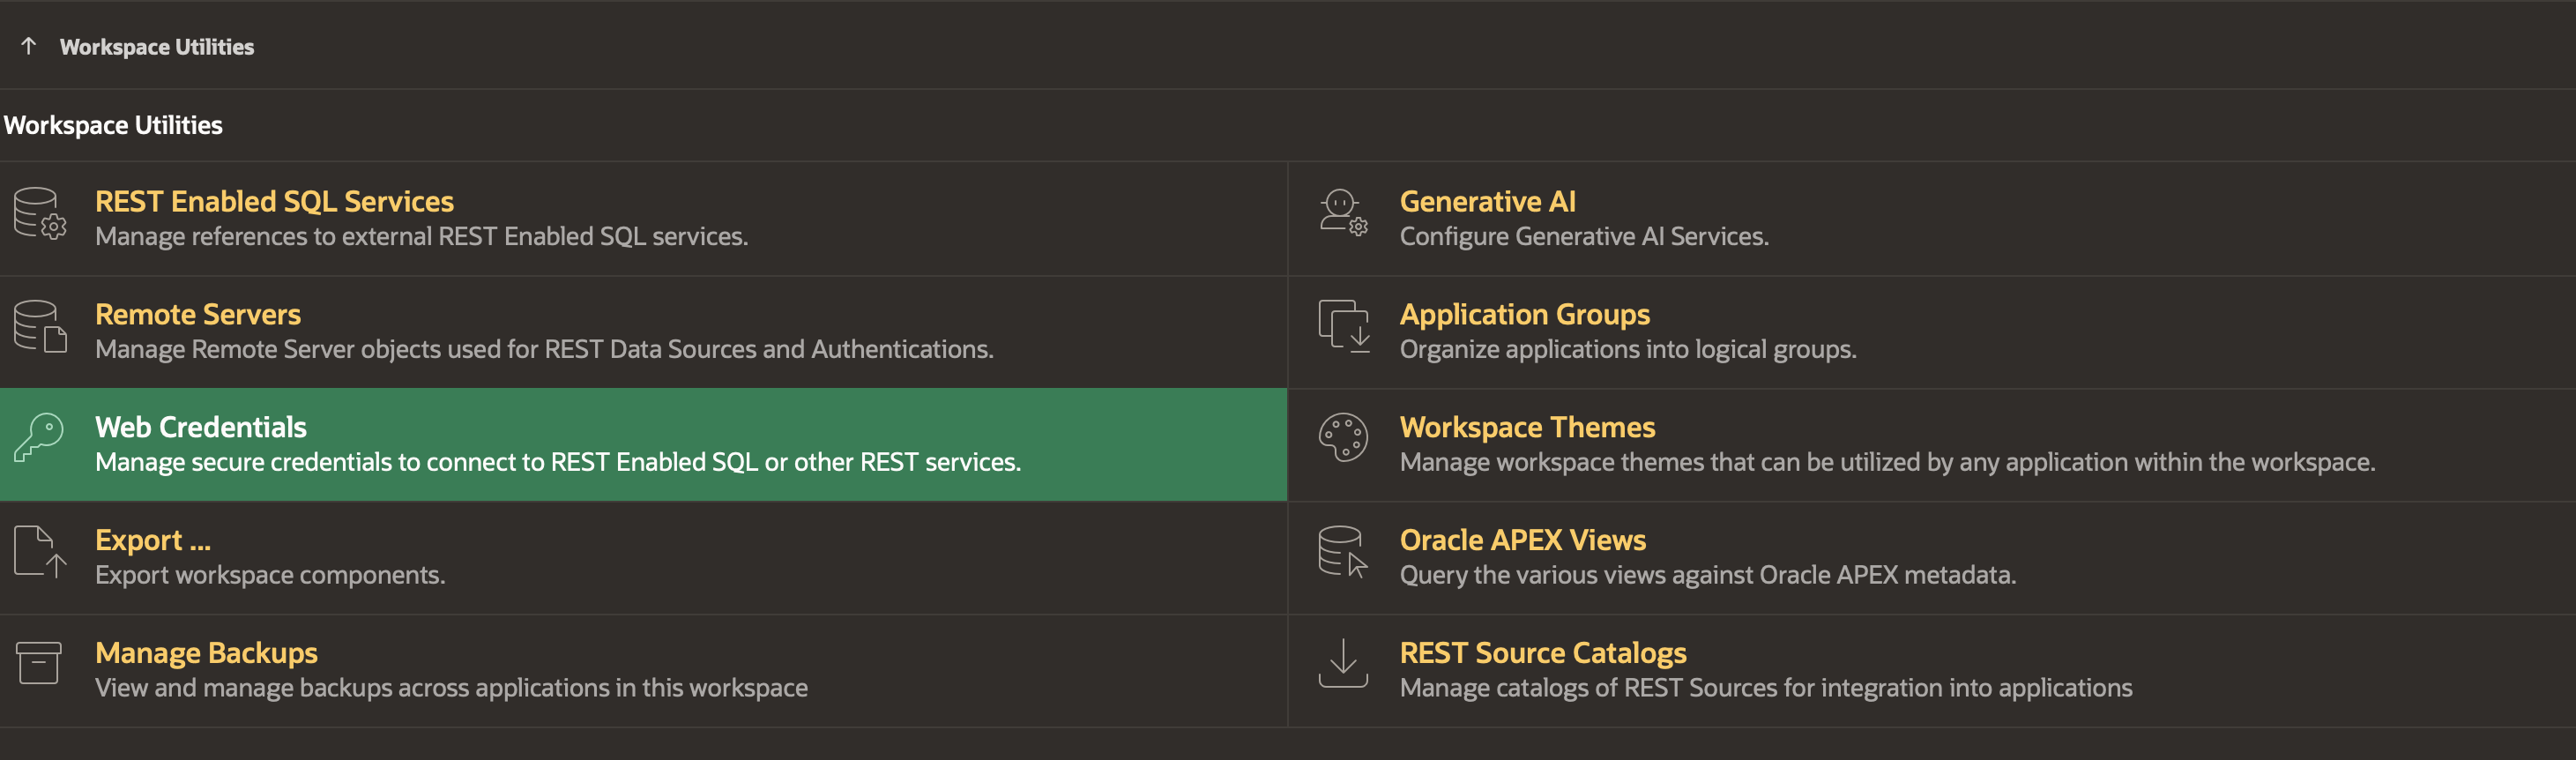
Navigate to the App Builder page in APEX and select Workspace Utilities.

From the list of utilities, choose Web Credentials.
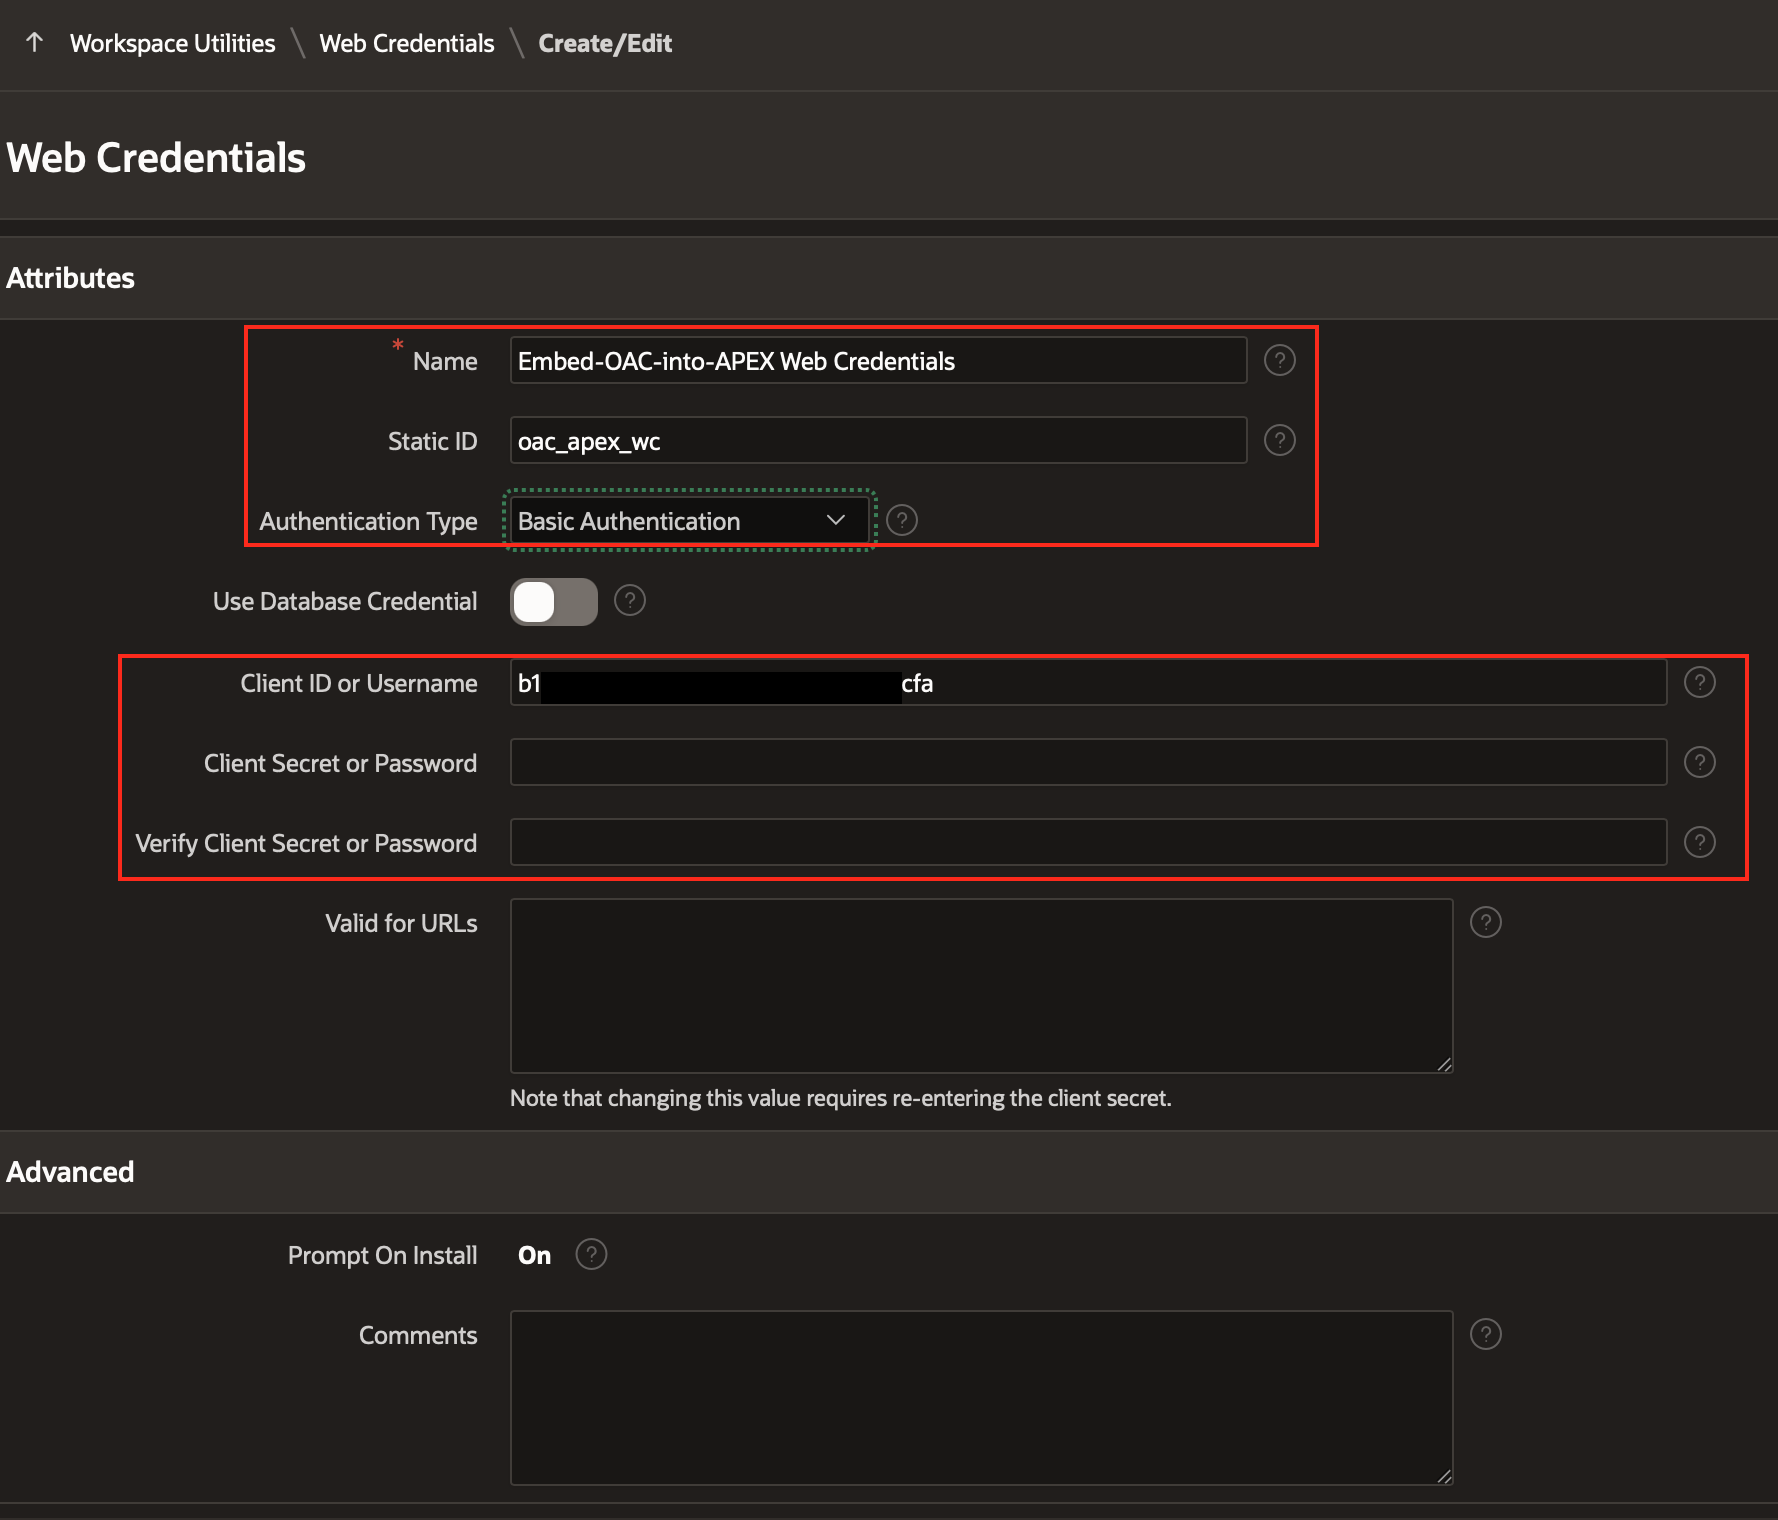
On the Web Credentials page, provide the following information alongside Name and Static ID:
- Authentication Type: select Basic Authentication.
- Enter the Client ID in the Client ID or Username field.
- Enter the Client Secret in the Client Secret or Password field. Re-enter the Client Secret in the Verify Client Secret or Password field.
Create Authentication Scheme
The final step in this configuration is to create an Authentication Scheme. Several sections require configuration:
- Name
Provide a name for the Authentication Scheme and select Social Sign-in for the Scheme Type.
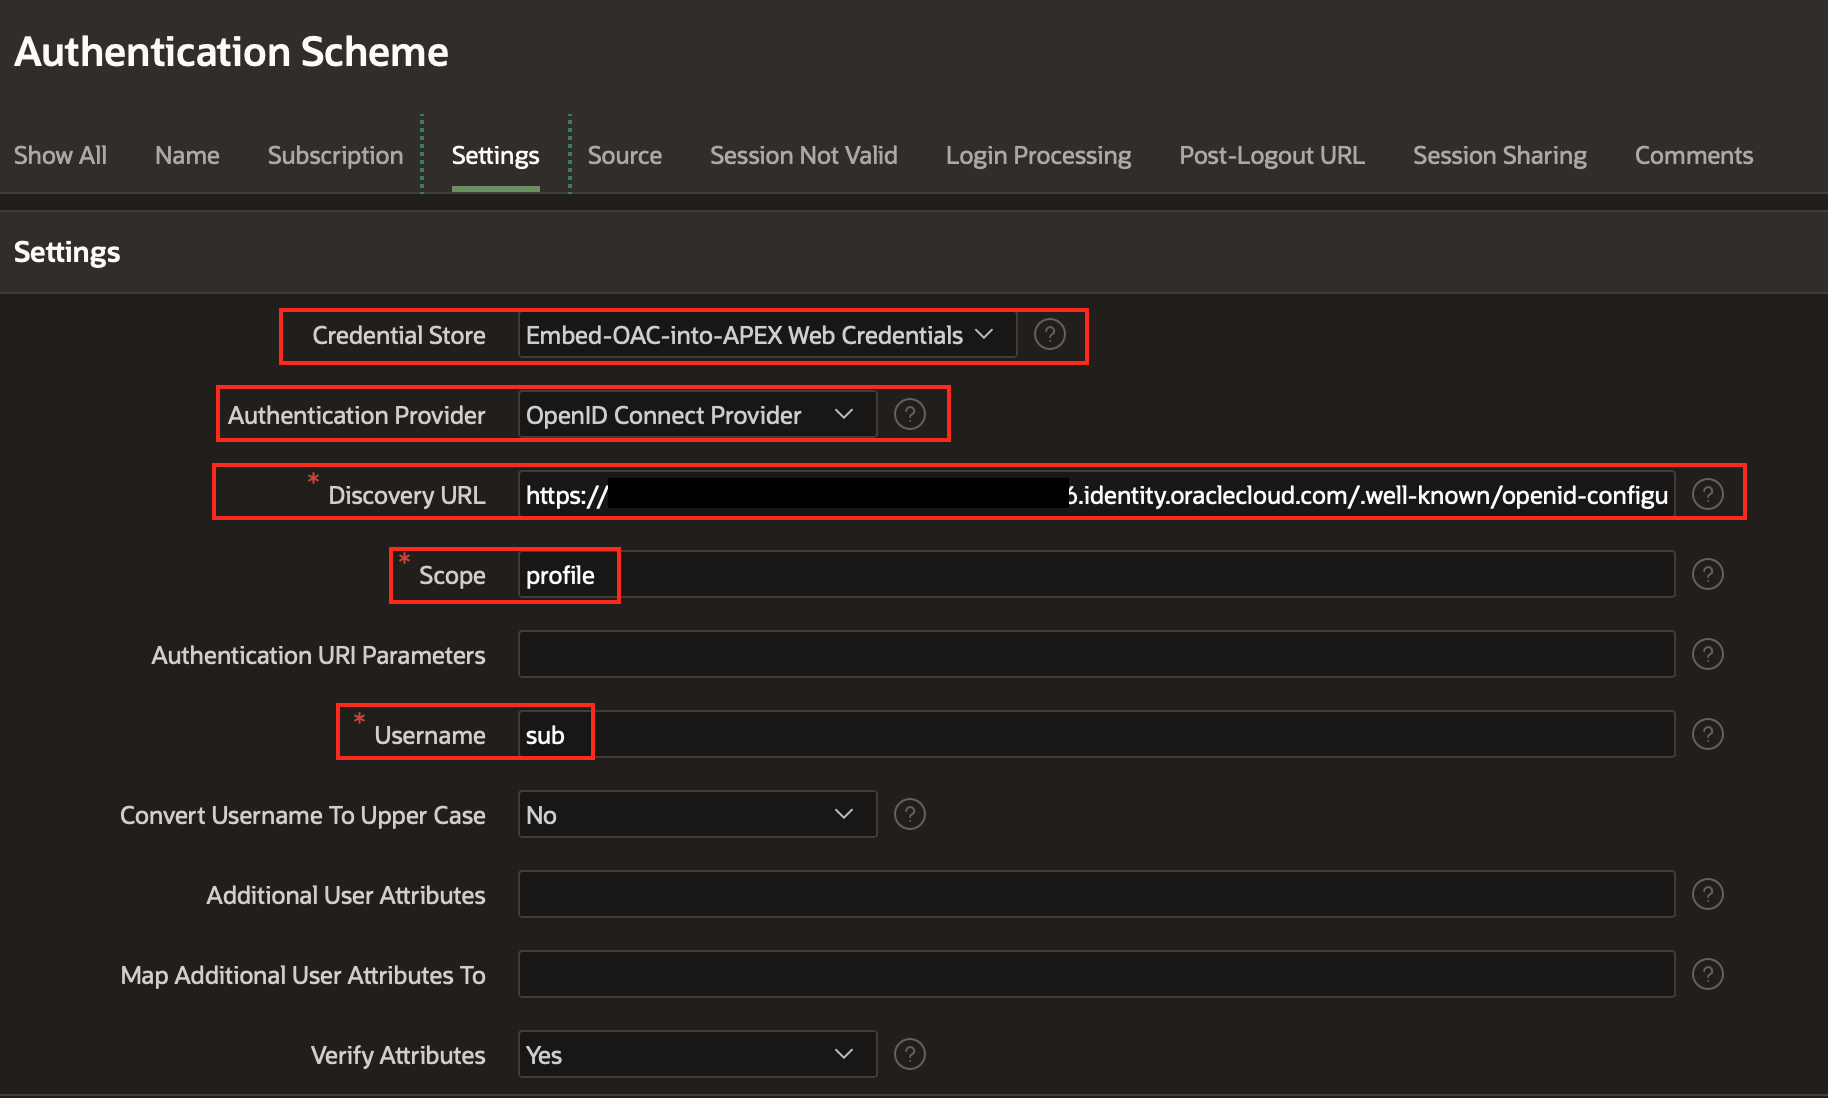
- Settings
Under Settings, select the Credentials Store created in the previous Web Credentials step.
Choose OpenID Connect Provider for Authentication Provider.
For the Discovery URL, enter:
https://<Identity Domain URL>.identity.oraclecloud.com/.well-known/openid-configuration
You can find the IDCS Domain URL on the Identity Domain page:

Use the Domain URL and append /.well-known/openid-configuration to complete the Discovery URL.
Enter profile in the Scope field and sub in the Username field.
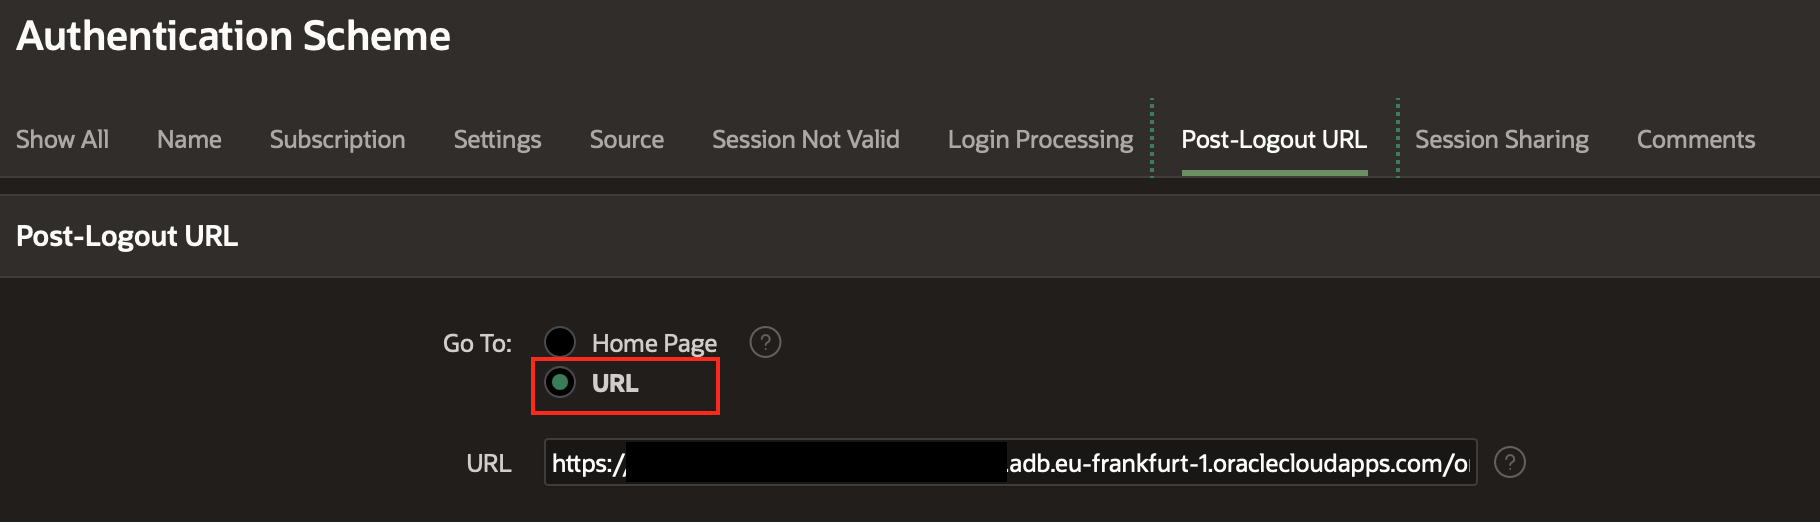
- Post Log-in Processing
Select URL for Go to and enter the APEX application URL in the URL field.
Almost Ready to Go!
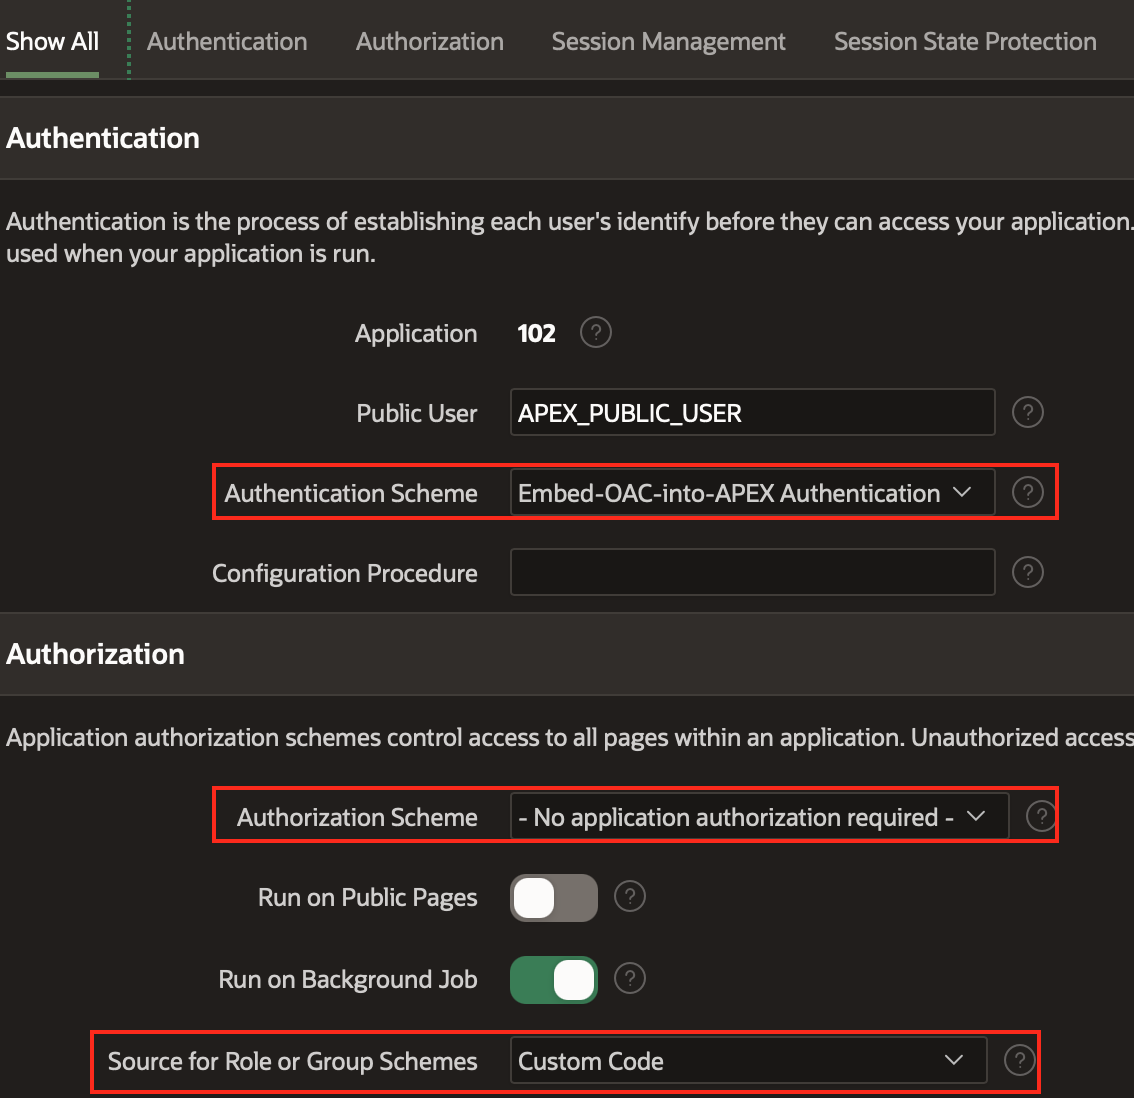
Before going live, update the Security Attributes under Shared Components.
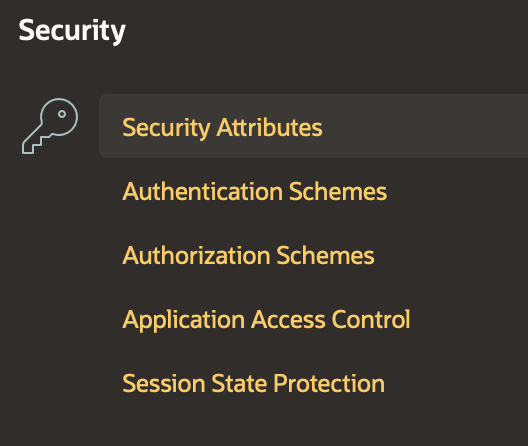
Update the following fields and apply the changes:
-
In the Authentication section:
- Leave APEX_PUBLIC_USER as the Public User.
- Select the Authentication Scheme created in the previous step.
-
In the Authorization section:
- Choose No application authorization required for the Authorization Scheme.
- Choose Custom Code for the Source for Roles or Group Schemes.
Run APEX Application
You are now ready to run the application:

Alternatively, enter the following URL in your browser to access the APEX application:
https:// ... APEX instance URL ... .adb.eu-frankfurt-1.oraclecloudapps.com/ords/r/apexdemo/embed-oac-into-apex-application/home
Conclusion
This exercise demonstrates how to integrate Oracle Analytics Cloud with an APEX application through careful configuration of user groups, OAuth settings, web credentials, and authentication schemes. While the process involves multiple steps, it primarily consists of configuration tasks that ensure secure and seamless access between the applications.
Throughout this process, I gained valuable hands-on experience creating my first APEX application and integrating it with Oracle Analytics. Although the tools have evolved since the days of WebDB and Oracle Portal, this exercise highlights the power and flexibility of modern Oracle Cloud services.
I hope this guide serves as a helpful resource for others looking to achieve similar integrations. Future posts will explore additional use cases, including integrating Oracle Analytics Server with APEX in on-premises environments. As always, feedback and comments are welcome via my private email.